
Homemade Samosa Sheets are one of those things I used to think only shops could pull off. You know the feeling, you want crispy samosas right now, but you do not want the fuss of hunting for samosa patti at the store. I have been there, standing in my kitchen with a bowl of filling ready, and absolutely nothing to wrap it in. After a few messy attempts and a couple of too thick wrappers, I finally found a method that works every single time. If you can roll out a simple dough and you have a little patience, you can make these at home and feel weirdly proud about it.
About Samosa
Samosa is basically a crunchy, stuffed snack that shows up in a lot of different places with little regional twists. Most of us know the classic triangle version filled with spiced potatoes and peas, but you will also see onion, lentil, chicken, and even sweet versions depending on the family and the city.
What makes a samosa feel like a real samosa is the outer layer. That wrapper is doing a lot of work. It has to hold the filling, seal well, and fry or bake into those flaky layers. That is why I got so into making Homemade Samosa Sheets. Once you have a stack in the fridge or freezer, samosa night becomes a quick, happy thing instead of a big project.
Also, if you are planning a snack spread, samosas play really nicely with other easy handheld foods. I often add something fun like delicious homemade pizza rolls in the air fryer so everyone has options without me cooking all day.
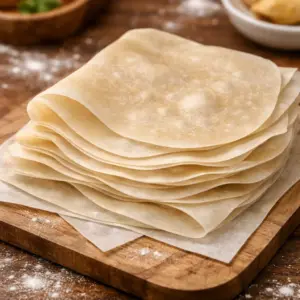
How to make Samosa (Stepwise Photos)
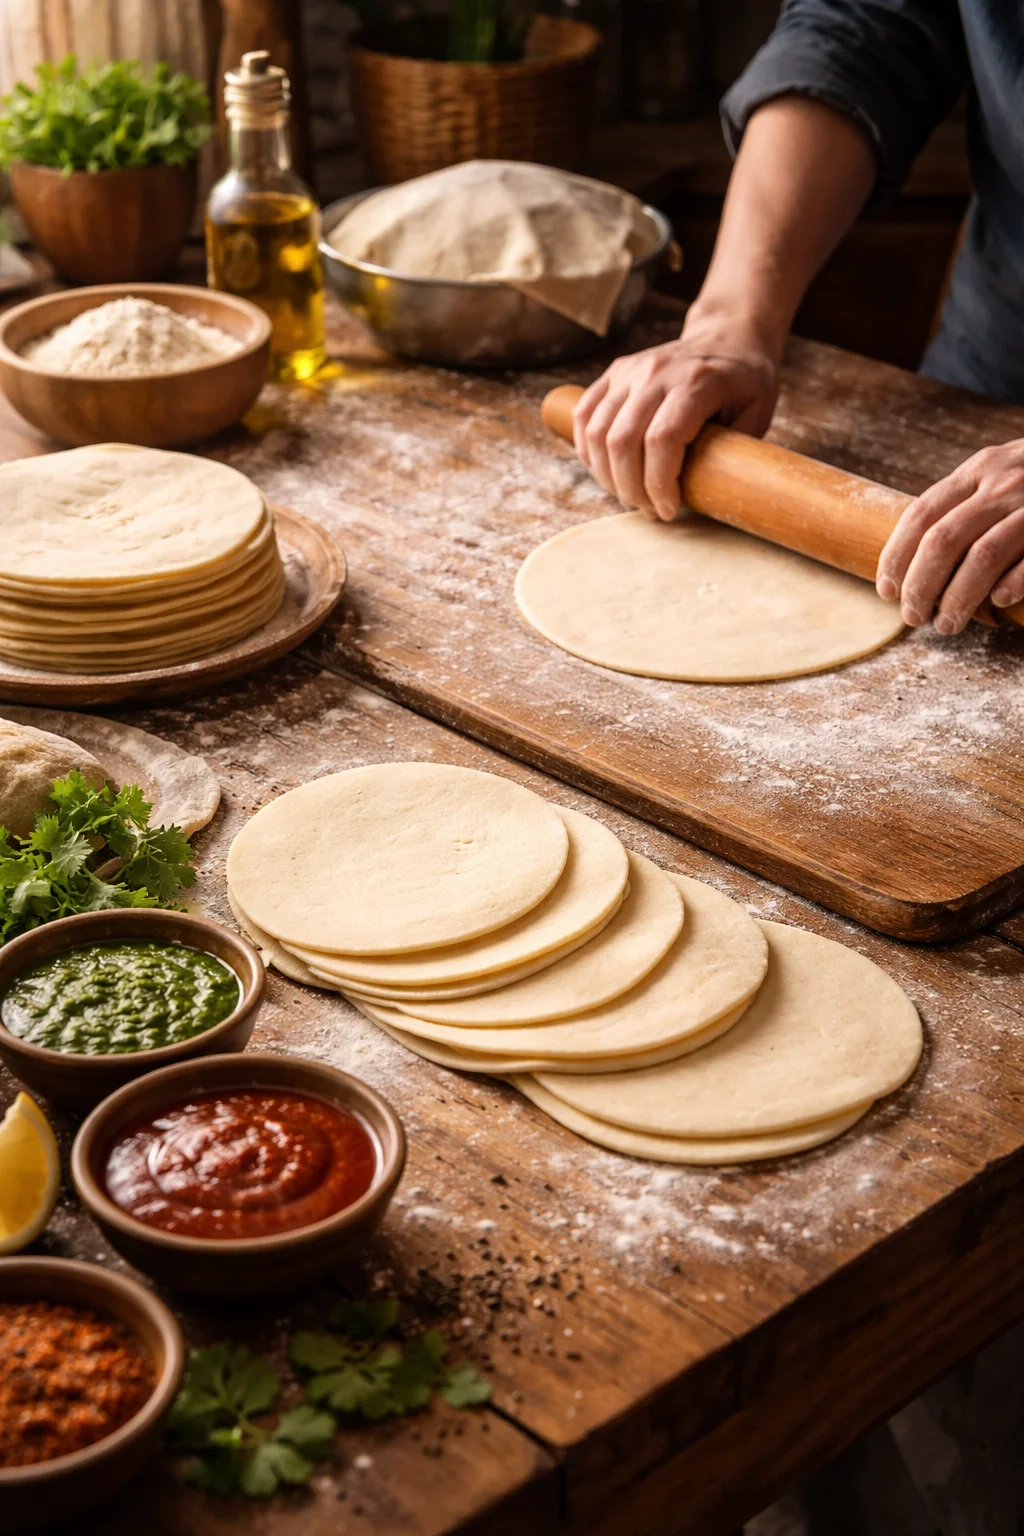
Let us talk wrappers, because this is the part people overthink. You do not need special equipment. A rolling pin, a clean counter, and a little time is enough. The goal is thin, even sheets that cook up crisp without turning chewy.
Ingredients and what you will need
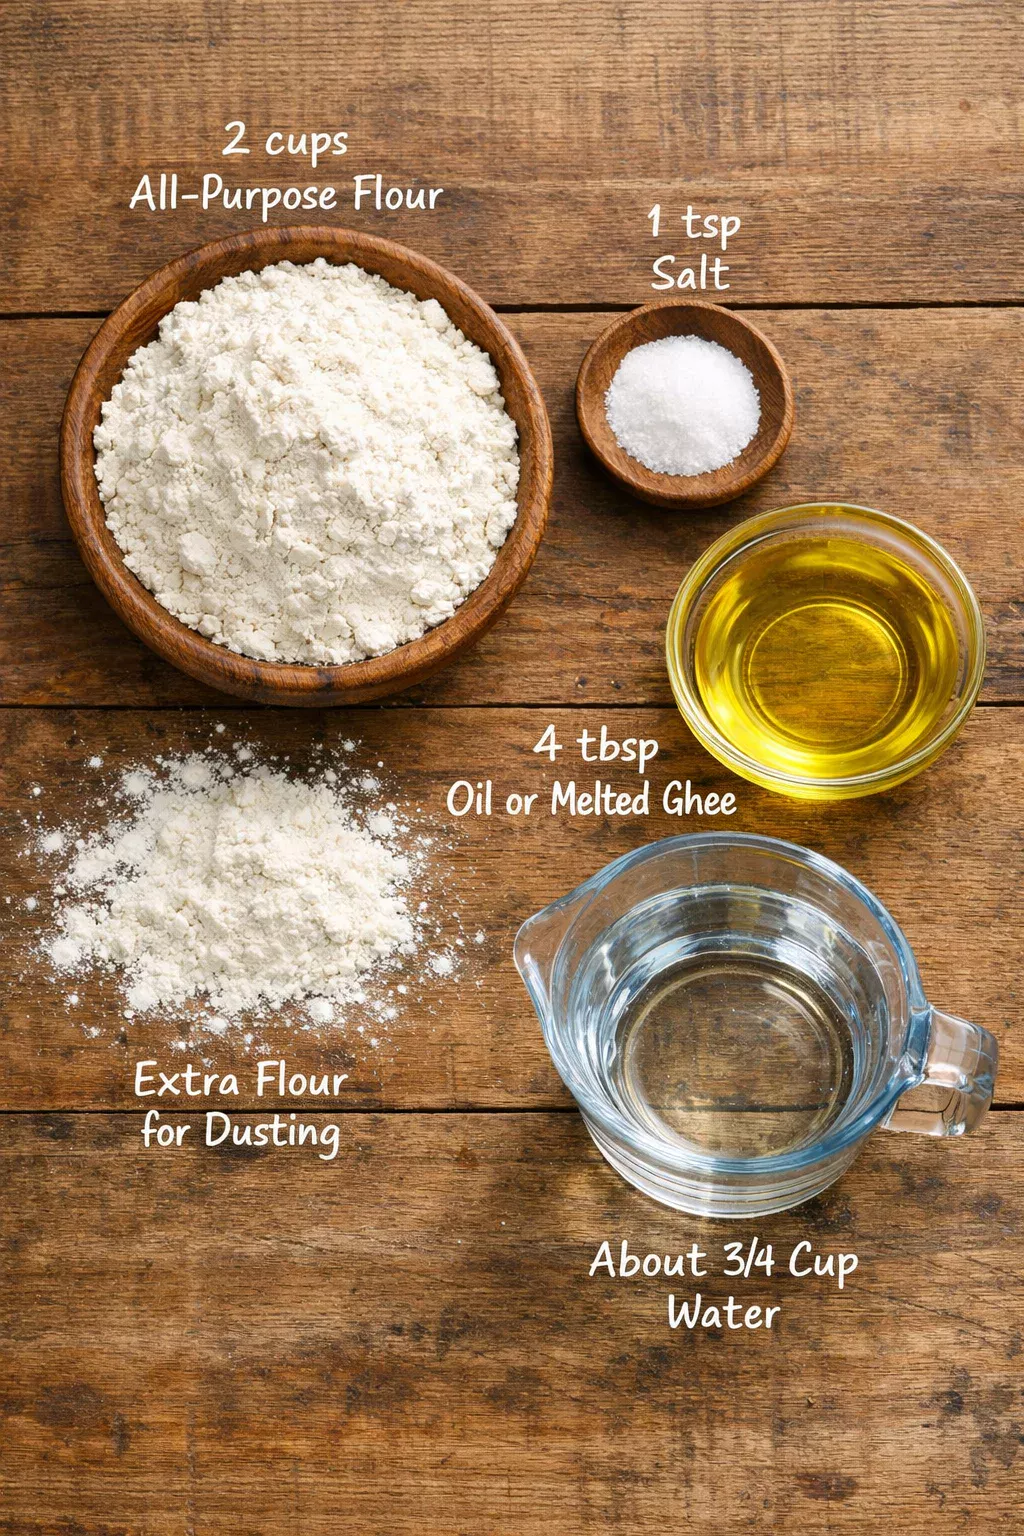
- 2 cups all purpose flour
- 1 tsp salt
- 4 tbsp oil (or melted ghee for richer flavor)
- About 3/4 cup water, added slowly
- A little dry flour for dusting
- Rolling pin, knife or pizza cutter, clean cloth or parchment paper
Step by step method
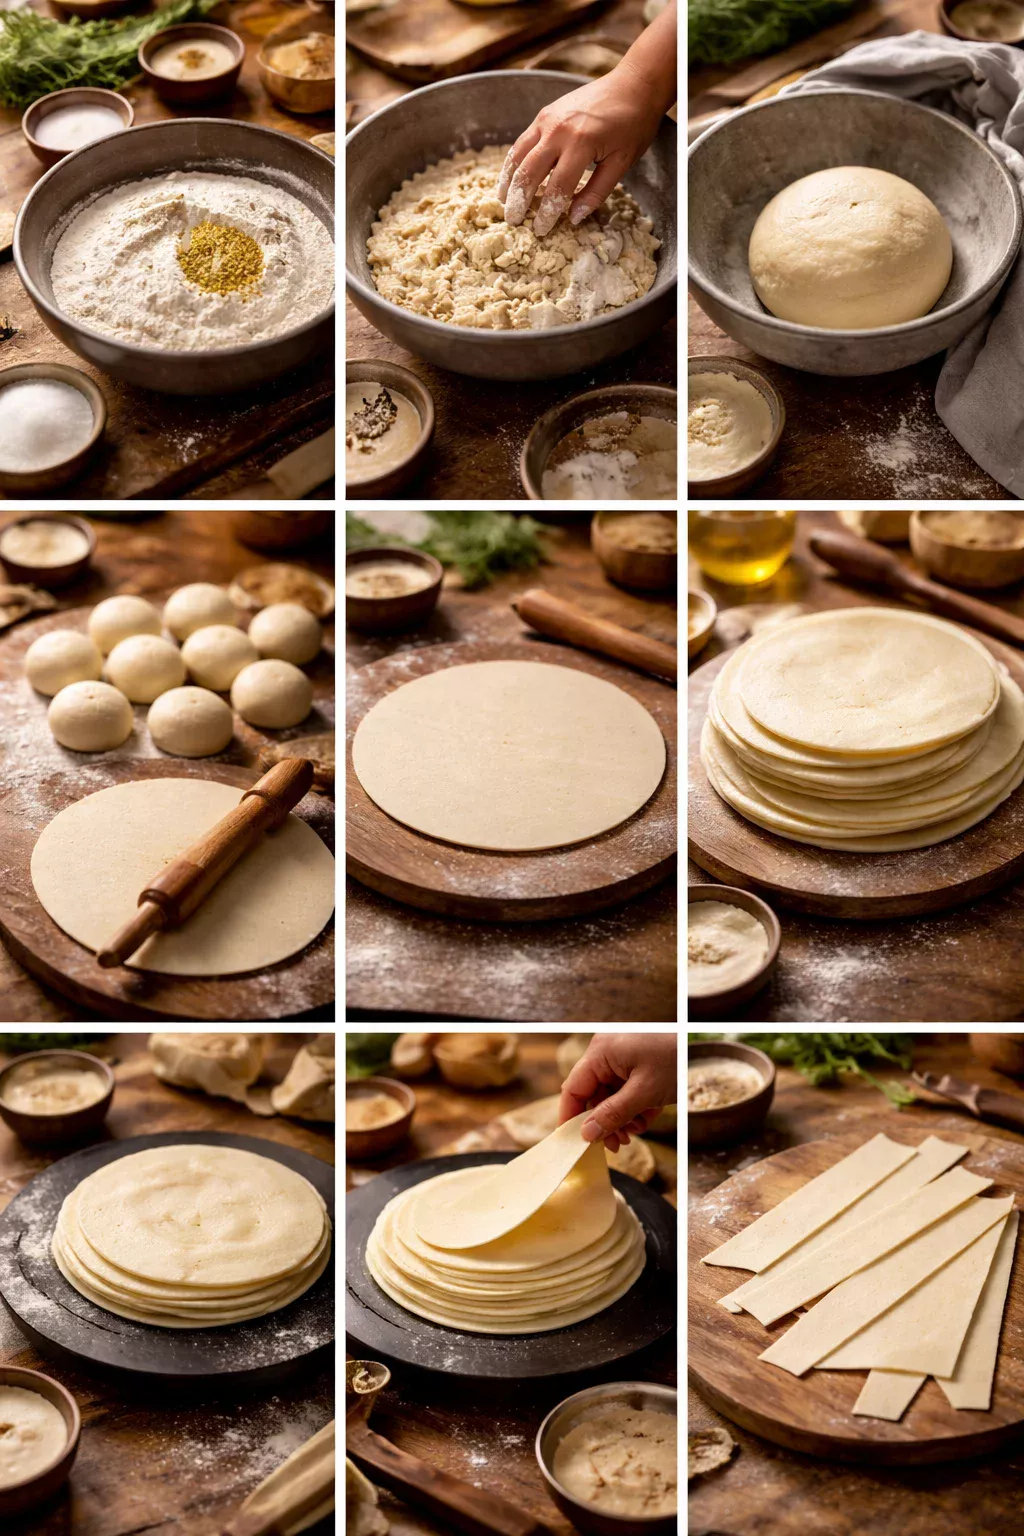
Step 1: Mix the dough. In a bowl, mix flour and salt. Add oil and rub it in with your fingers until it looks like slightly damp sand. This step is important because it helps the sheets turn crispy later. Add water slowly and bring it into a firm dough. It should not feel sticky.
Step 2: Rest it. Cover the dough and let it rest for 20 to 30 minutes. This is the part where the dough calms down and becomes easier to roll. If you skip it, you will fight the dough and you will not enjoy it.
Step 3: Divide and roll. Make 6 to 8 balls. Roll one ball into a thin circle. Dust lightly as needed, but do not go wild with flour or the layers will feel dusty.
Step 4: Brush and stack for layers. Here is my favorite trick. Roll two circles about the same size. Brush a tiny bit of oil on one, sprinkle a pinch of flour, and place the second circle on top. Now roll them together a little so they stick as a pair.
Step 5: Cook lightly on a pan. Heat a flat pan on medium. Place the doubled roti on it and cook just until you see pale spots. Flip and do the same. Do not brown it. We are not making a fully cooked flatbread, just setting the layers so they separate later.
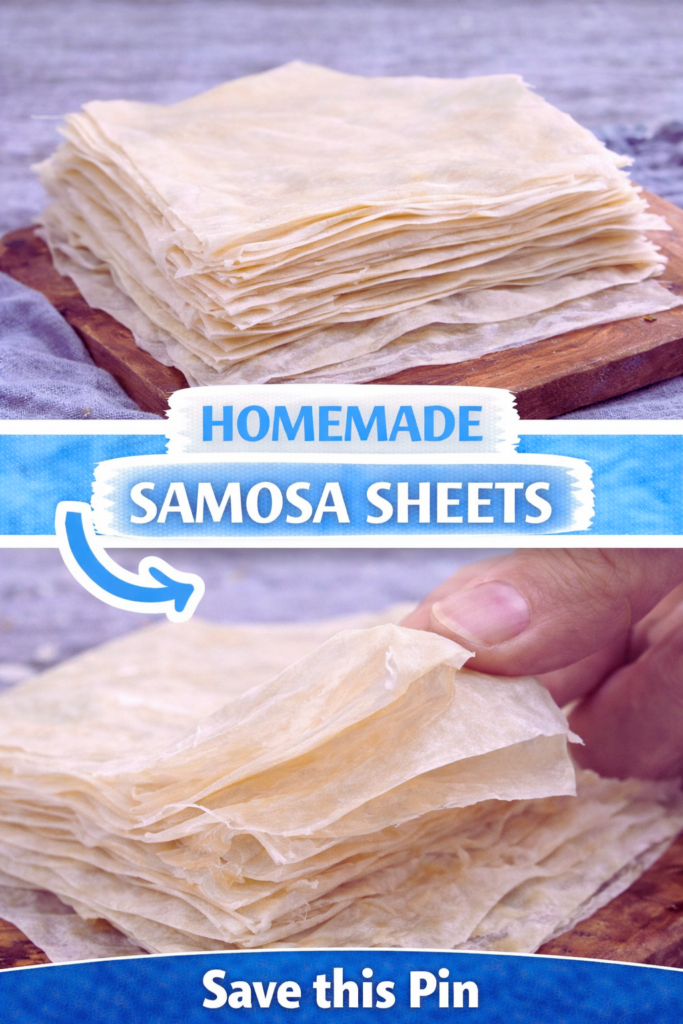
Step 6: Separate into sheets. While it is still warm, peel the two layers apart. You will get two thin sheets from one pair. Stack them under a clean cloth so they do not dry out.
Step 7: Cut into strips if you want patti style. For samosa patti, cut the round sheets into long strips. I usually go for about 2 inches wide. Then you are ready to fill and fold.
If you are meal prepping snacks for the week, these sheets are a lifesaver. I do the same kind of prep mindset when I make things like easy delicious homemade gluten free granola bars, because having ready to go options makes life feel less chaotic.
Expert Tips
I learned these the hard way, so you do not have to.
Keep the dough firm. Soft dough sounds nice, but it makes thicker sheets and they can turn chewy. Firm dough rolls thinner and cooks crisp.
Do not brown the paired roti. If you brown it, it gets brittle and cracks when you fold. Pale spots are enough.
Separate while warm. If you wait too long, steam makes the layers stick and you will tear them.
Cover the stack. Samosa sheets dry out quickly. Keep them under a cloth or in a covered container.
Freeze smart. Place parchment between sheets, stack them, and freeze in a zip bag. When you need them, thaw for 10 minutes and they are flexible again.
I tried these Homemade Samosa Sheets after failing with store wrappers that kept tearing. The layering trick actually works and my samosas came out crisp and not oily at all. I am never going back.
One more quick thing, if you are serving samosas as part of dinner, pair them with something saucy and comforting. On busy nights I will do samosas plus quick delicious homemade butter chicken and suddenly it feels like a full little feast.
How to make baked vegetable samosa
If frying feels like too much, baked samosas are honestly a great option. You will not get the exact same deep fried crunch, but you will still get a crisp bite, especially if you brush oil and bake hot.
Simple veggie filling idea: Boil and mash potatoes, then mix in cooked peas, chopped cilantro, green chili, salt, cumin, garam masala, and a squeeze of lemon. Let it cool fully before filling. Warm filling makes the sheets soggy and that is just sad.
How I bake them:
Preheat oven to 425 F. Fill and fold samosas, then place them on a lined tray. Brush or spray with oil on all sides. Bake 18 to 25 minutes, flipping once halfway, until deep golden and crisp. If your oven runs cool, give them a few extra minutes.
When I want a lighter dinner but still want something satisfying, I do baked veggie samosas and a simple salad. If you need another fast weeknight idea for the rotation, this tasty salmon pasta with homemade pesto for busy weeknights is also a solid one.
How to fold filo pastry for samosa
Sometimes you just want samosas now, and filo pastry is sitting in the fridge. Totally fine. The texture is a bit more shattery and delicate, but it is still delicious.
Here is my easy folding method:
Cut filo into strips, about 3 inches wide. Keep the rest covered with a damp cloth because filo dries out in minutes. Brush one strip lightly with oil or melted butter. Place a spoon of filling near one end and fold into a triangle, like folding a flag. Keep flipping the triangle over itself until you reach the end. Seal the last edge with a little flour and water paste. Bake at 400 F until golden, usually 15 to 20 minutes depending on your oven.
Quick tip: Do not overfill. Filo will rip if you get ambitious with the stuffing.
Common Questions
1) Can I make Homemade Samosa Sheets ahead of time?
Yes. Keep them in the fridge for 2 to 3 days, covered well. For longer storage, freeze with parchment between layers.
2) Why are my sheets turning chewy instead of crisp?
Usually the dough is too soft or the sheets are too thick. Next time, keep the dough firm and roll thinner. Also, avoid browning during the light pan cooking step.
3) Can I use whole wheat flour?
You can, but the sheets will be a little less crisp and slightly more earthy in flavor. A mix of half wheat and half all purpose is a nice compromise.
4) How thin should I roll them?
Thin enough that you can almost see your countertop pattern through it, but not so thin that it tears when you lift it. After a couple tries, your hands just get it.
5) What is the best way to seal samosas?
A simple flour and water paste works best. Make it thick like glue, not watery.
A cozy wrap up before you start rolling
Once you get the hang of Homemade Samosa Sheets, it feels like unlocking a snack superpower. You can stock your freezer, make samosas whenever you want, and play around with fillings without relying on store wrappers. If you want more filling ideas, I like checking variations like onion samosa recipe | patti samosa with samosa sheets | irani samosa and the classic guide from Samosa Recipe (Punjabi Potato Samosa) – Swasthi’s Recipes. Try a small batch first, and do not stress if the first couple are a little wonky. They still taste amazing, and honestly, those are the ones I eat first straight off the tray.
Homemade Samosa Sheets
Ingredients
For the Samosa Sheets
- 2 cups all purpose flour You can substitute with whole wheat flour for a different flavor.
- 1 tsp salt Use to taste.
- 4 tbsp oil Or melted ghee for richer flavor.
- 3/4 cup water Add slowly to make a firm dough.
- a little dry flour for dusting To prevent sticking while rolling.
Instructions
Preparation
- Mix the dough. In a bowl, mix flour and salt. Add oil and rub it in with your fingers until it looks like slightly damp sand.
- Add water slowly and bring it into a firm dough. It should not feel sticky.
- Cover the dough and let it rest for 20 to 30 minutes.
- Make 6 to 8 balls. Roll one ball into a thin circle, dusting lightly with flour as needed.
- Roll two circles about the same size. Brush a tiny bit of oil on one, sprinkle a pinch of flour, and place the second circle on top.
- Heat a flat pan on medium. Place the doubled roti on it and cook just until you see pale spots, flipping once. Do not brown it.
- While it is still warm, peel the two layers apart to get two thin sheets.
- Cut the round sheets into long strips for samosa patti, about 2 inches wide.