
Easter Bunny Punch is my go to move when I need something cute for spring but I do not want to overthink it. You know that moment when you have a blank card, a gift bag, or a kid who wants to craft right now, and your brain is just not ready. This little punch art bunny saves the day because it is simple, fast, and still looks like you tried. I usually make a batch while I am setting up snacks, and it turns into a whole vibe at the table. If you are craving an easy Easter craft that actually turns out, you are in the right place.
Materials Needed for Easter Bunny Punch Art
Let us keep this super practical. You do not need a fancy craft room to pull off Easter Bunny Punch art. Most of this you can find at a big box store, a small craft shop, or even in a drawer if you have done any scrapbooking before.
My simple supply list
- Paper punches: one circle punch (1 inch to 1.5 inch is perfect) and one oval punch for the ears, if you have it
- Cardstock: white, pastel pink, and one background color like mint, lavender, or pale yellow
- Glue: a glue stick works, but I like a tacky craft glue for stronger hold
- Scissors: for trimming ears if you do not have an oval punch
- Black pen or fine marker: for eyes and whiskers
- Pink marker or tiny pink paper bits: for cheeks and nose
- Optional sparkle: tiny pom poms, glitter paper, or a mini cotton ball tail
If you want your bunny to look extra clean, a small ruler helps with placement, but I will be honest, I usually eyeball it. Also, if you are hosting Easter snacks while crafting, set out something fun like these Easter rainbow fruit kabobs. They keep kids busy and they are not sticky like frosting. 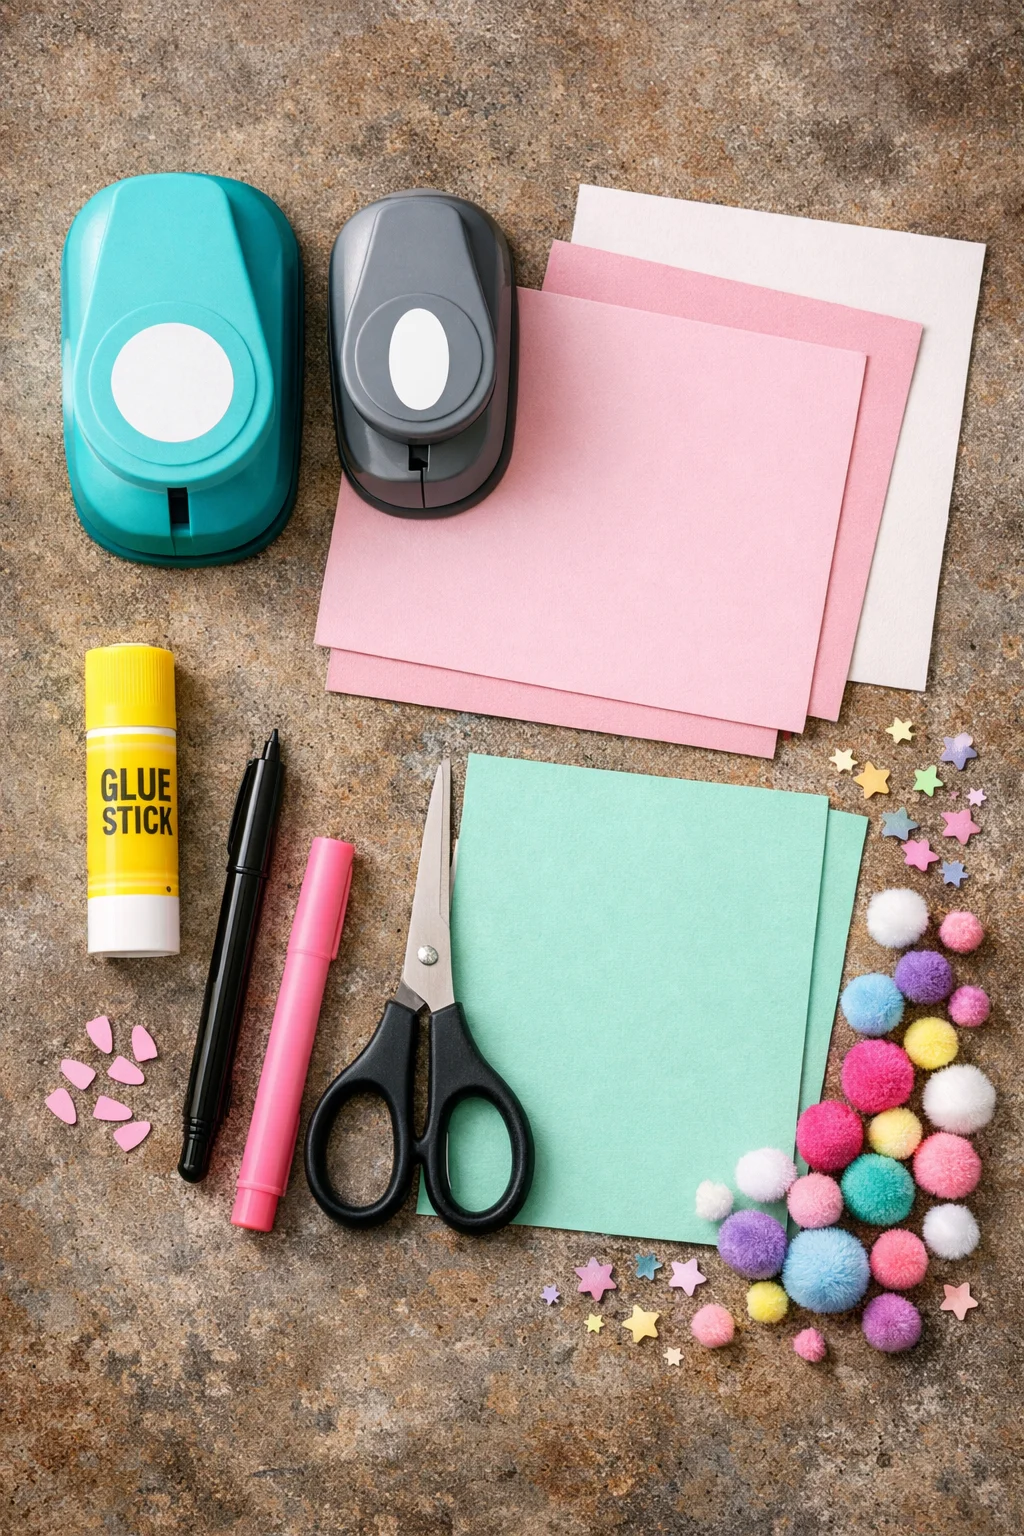
Step-by-Step Guide to Creating Easter Bunny Punch Art
This is the part where Easter Bunny Punch becomes almost relaxing. Once you make one bunny, the rest go fast. I like to punch a bunch of shapes first, then assemble like a little bunny factory.
Easy assembly steps
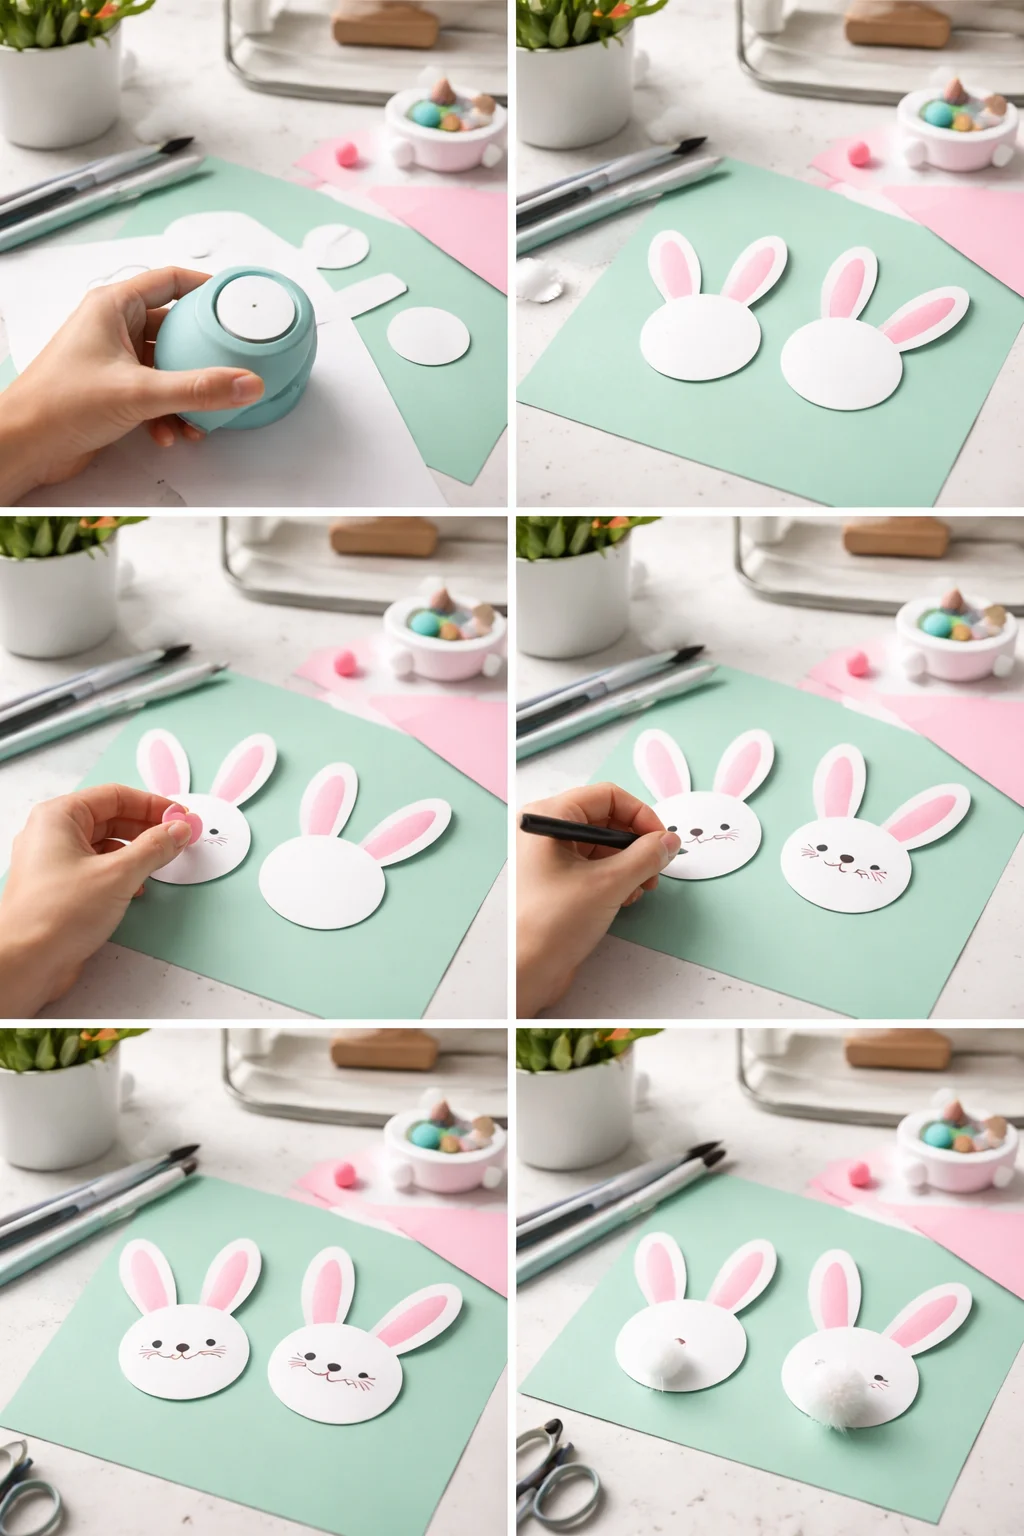
Step 1: Punch one white circle for the bunny face. If you want a bigger bunny, go up a size. Glue it onto your background cardstock.
Step 2: Make two ears. If you have an oval punch, punch two white ovals. If not, cut two long ovals with scissors. Glue them behind the circle so they peek out at the top.
Step 3: Add inner ears. Punch or cut two smaller pink ovals and glue them centered on the white ears. This is where it starts looking adorable, fast.
Step 4: Draw the face. Two small dots for eyes, a tiny pink triangle or dot for the nose, and a simple curved mouth. Add whiskers if you feel like it.
Step 5: Add a tail if your bunny is full body or if you want the head to pop. A mini cotton ball or pom pom is the easiest win.
My biggest tip is to let the glue set for a minute before you draw the face. If the paper is sliding around, your eyes end up a little wild, and suddenly your bunny looks like it drank espresso. Still cute, but you know what I mean.
When I craft with kids, I keep a “snack break” ready, and this is also the perfect time to bring out something themed like Easter carrot patch strawberries. They are bright, easy to grab, and honestly they look great next to the bunnies on the table.
Creative Variations on Easter Bunny Designs
Once you have the basic Easter Bunny Punch look down, you can switch things up without buying more supplies. This is where you can match your party colors, personalize baskets, or make different bunny “characters” for each kid.
Here are a few variations I actually use:
1. Sleepy bunny: Draw the eyes as little curved lines like it is napping. Add rosy cheeks with a pink marker.
2. Flower crown bunny: Punch tiny circles from bright paper and glue them like a headband between the ears. Even better if you have floral scrapbook paper.
3. Polka dot bunny ears: Use patterned paper for the inner ear or add dots with markers.
4. Peeking bunny: Glue the bunny face so it looks like it is popping out from behind a paper “grass” strip at the bottom of your card.
5. Fancy bow tie bunny: Cut a small bow tie shape and glue it under the face. This is adorable on place cards for brunch.
I also love mixing crafts and treats when I am doing Easter prep. If you are already doing pastel colors, you might want dessert to match. These pastel tie dye Easter chocolate chip cookies fit the same cheerful vibe and make the whole setup feel planned, even if you did it last minute.
“I tried this bunny punch art with my daughter for her classroom cards, and it was the first craft we both enjoyed without getting frustrated. The bunnies turned out so cute that the teacher asked how we made them.”
Tips for Using Punch Art Effectively
This is where I save you from the tiny annoyances that can make punch art feel fiddly. Easter Bunny Punch art is easy, but a few little tricks make it look cleaner and help everything stick.
Use thicker paper: Cardstock is your best friend. Thin paper wrinkles when you glue it, and the ears can curl.
Glue lightly: Too much glue makes bumps. I do small dots of tacky glue, then press for a few seconds.
Make a quick template: If you are making a bunch, lightly mark where the circle face should go on one card, then use it as your guide for the rest.
Keep faces simple: Two dots and a tiny nose are enough. The more you draw, the more chances it gets uneven.
If you are crafting with kids, I recommend you pre punch the shapes. Let them do the gluing and drawing. That way, they get the fun part without the paper punch struggle. Also, put down a scrap sheet, because those tiny punched circles will travel everywhere.
How to Incorporate Punch Art into Gifts and Cards
This is my favorite part because it makes your Easter stuff look custom without buying fancy gift tags. Easter Bunny Punch works on so many things, and it takes just a couple minutes per piece.
Easy ways to use it:
On Easter cards: Add one bunny face to the front and write a short message like “Hoppy Easter” inside.
On gift tags: Glue a bunny to a small rectangle of cardstock, punch a hole, and tie it to a basket with ribbon or twine.
On treat bags: Staple a bunny tag to the top of a clear bag filled with candy or mini cookies.
On place cards: Write names under each bunny and set them at the table for brunch.
If you are doing a dessert table, I love pairing bunny tags with something like strawberry shortcake Easter cheesecake eggs. They look fancy, but the bunny punch art keeps it playful and kid friendly.
Common Questions
Can I make Easter Bunny Punch if I do not have a paper punch?
Yes. You can trace coins or bottle caps for circles and cut the ears with scissors. It takes a little longer but looks just as cute.
What is the best glue for punch art on cards?
A glue stick works for light paper, but tacky glue or double sided tape holds better on cardstock and gift tags.
How do I keep the ears from falling off?
Glue the ears behind the head circle, then press firmly for a few seconds. If you are mailing the card, use a stronger adhesive like tacky glue.
Can I prep these ahead for a classroom or party?
Totally. Punch all the shapes the night before and store them in a small container or zip bag. Then assembly goes fast the next day.
How do I make the bunny face look even?
Draw the eyes first, then add the nose centered under them. If you mess up, you can glue on tiny paper dots as “eyes” instead of drawing.
A sweet final note before you start punching
If you try Easter Bunny Punch this week, keep it simple and have fun with it. A few basic punches, some cardstock, and a pen really can turn into something that looks handmade in the best way. If you want more inspiration, I like browsing ideas like Easter Bunny Punch Art – Lisa Ann Bernard at Queen B Creations and also this cute Easter Bunny Punch Art Card – Northwest Stamper when I am in a creative rut. Now grab your paper, make one bunny, and I swear the rest will feel easy. You have got this, and your cards and gifts are about to look so cheerful.
Easter Bunny Punch Art
Ingredients
Materials Needed
- 1 each Circle punch (1 inch to 1.5 inch) For creating the bunny face
- 1 each Oval punch For the bunny ears, optional
- 3 sheets Cardstock (white, pastel pink, background color) Choose colors like mint, lavender, or pale yellow
- 1 stick Glue stick or tacky craft glue Tacky glue recommended for stronger hold
- 1 pair Scissors For trimming ears if you do not have an oval punch
- 1 each Black pen or fine marker For drawing eyes and whiskers
- 1 each Pink marker or tiny pink paper bits For cheeks and nose
- Optional Sparkle (tiny pom poms, glitter paper, or mini cotton ball) For tail decoration
Instructions
Creating the Bunny
- Step 1: Punch one white circle for the bunny face. If you want a bigger bunny, go up a size. Glue it onto your background cardstock.
- Step 2: Make two ears. If you have an oval punch, punch two white ovals. If not, cut two long ovals with scissors. Glue them behind the circle so they peek out at the top.
- Step 3: Add inner ears. Punch or cut two smaller pink ovals and glue them centered on the white ears.
- Step 4: Draw the face with two small dots for eyes, a tiny pink triangle or dot for the nose, and a simple curved mouth. Add whiskers if desired.
- Step 5: If desired, add a tail using a mini cotton ball or pom pom for a full-body bunny.