

PEPPERONI PIZZA HAWAIIAN ROLLS saved my sanity the first time I had to feed a crowd fast without stressing out. Maybe you’ve been there too. You want something warm, cheesy, and satisfying that feels a little fun but doesn’t take all night. That’s exactly what these sliders are about. They’re easy to assemble, crazy flavorful, and you can customize them with whatever you have on hand. Let’s walk through everything so your batch comes out golden, melty, and downright irresistible.
What type of bread should I use in the Pizza Sliders?
The short answer is Hawaiian rolls. They’re soft, slightly sweet, and they toast beautifully on the bottom while staying fluffy inside. That touch of sweetness makes the savory pepperoni and sauce pop without overpowering anything. If you’re grabbing a 12-pack, that’s the perfect size for a family dinner or a game-day snack platter.
If you want to branch out, here’s what I look for: a soft, pull-apart dinner roll that doesn’t crumble, a little sweetness to balance the salty meat, and a size that slices cleanly in one sheet for easy assembly. Brioche rolls work nicely too, and potato rolls are great if you want something a bit sturdier.
- Classic Hawaiian rolls: ideal for sweetness and texture.
- Potato dinner rolls: slightly denser, hold up to lots of toppings.
- Brioche sliders: rich and buttery, fantastic with garlic butter.
- Gluten-free dinner rolls: go for soft styles that toast well. If you need a reliable option, these gluten-free dinner rolls are a crowd-pleaser.
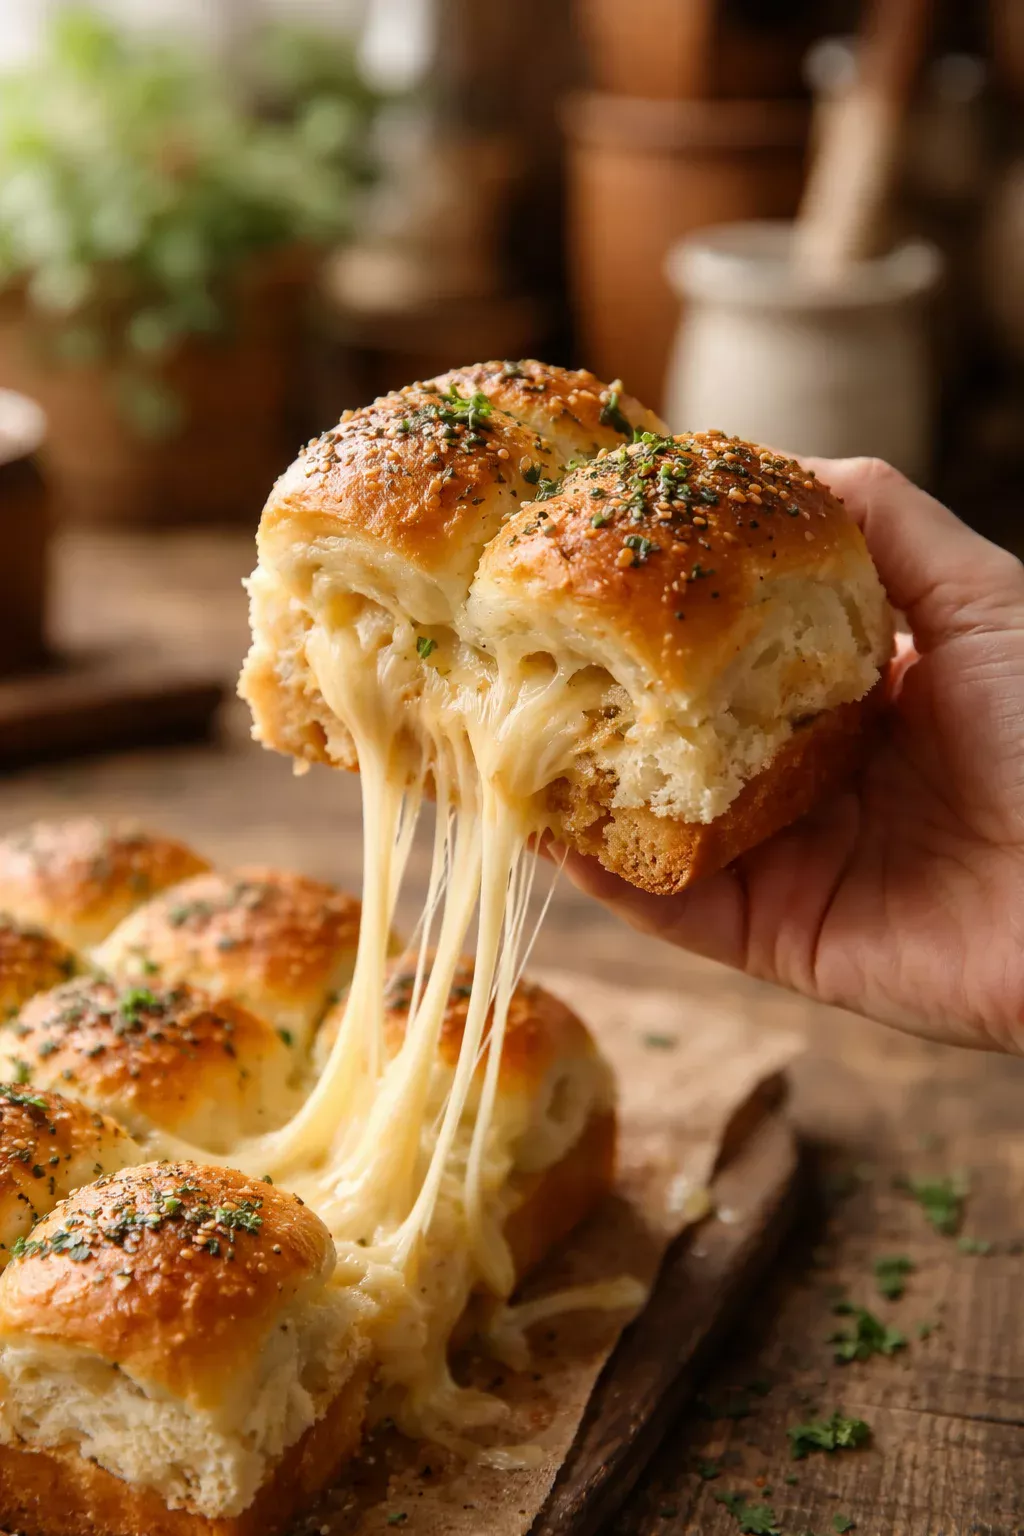
For the best texture, slice the entire sheet of rolls horizontally with a long serrated knife. Don’t separate them. That way, you can layer sauce, cheese, and pepperoni evenly, then cap it with the top sheet. It keeps everything tidy and bakes up uniformly.
Quick bake tip: lightly toast the bottom half for 3 to 4 minutes at 350 F before adding sauce if you like a sturdier bite. It helps prevent sogginess without drying anything out.
What type of cheese should I use in this Pizza Sliders Recipe?
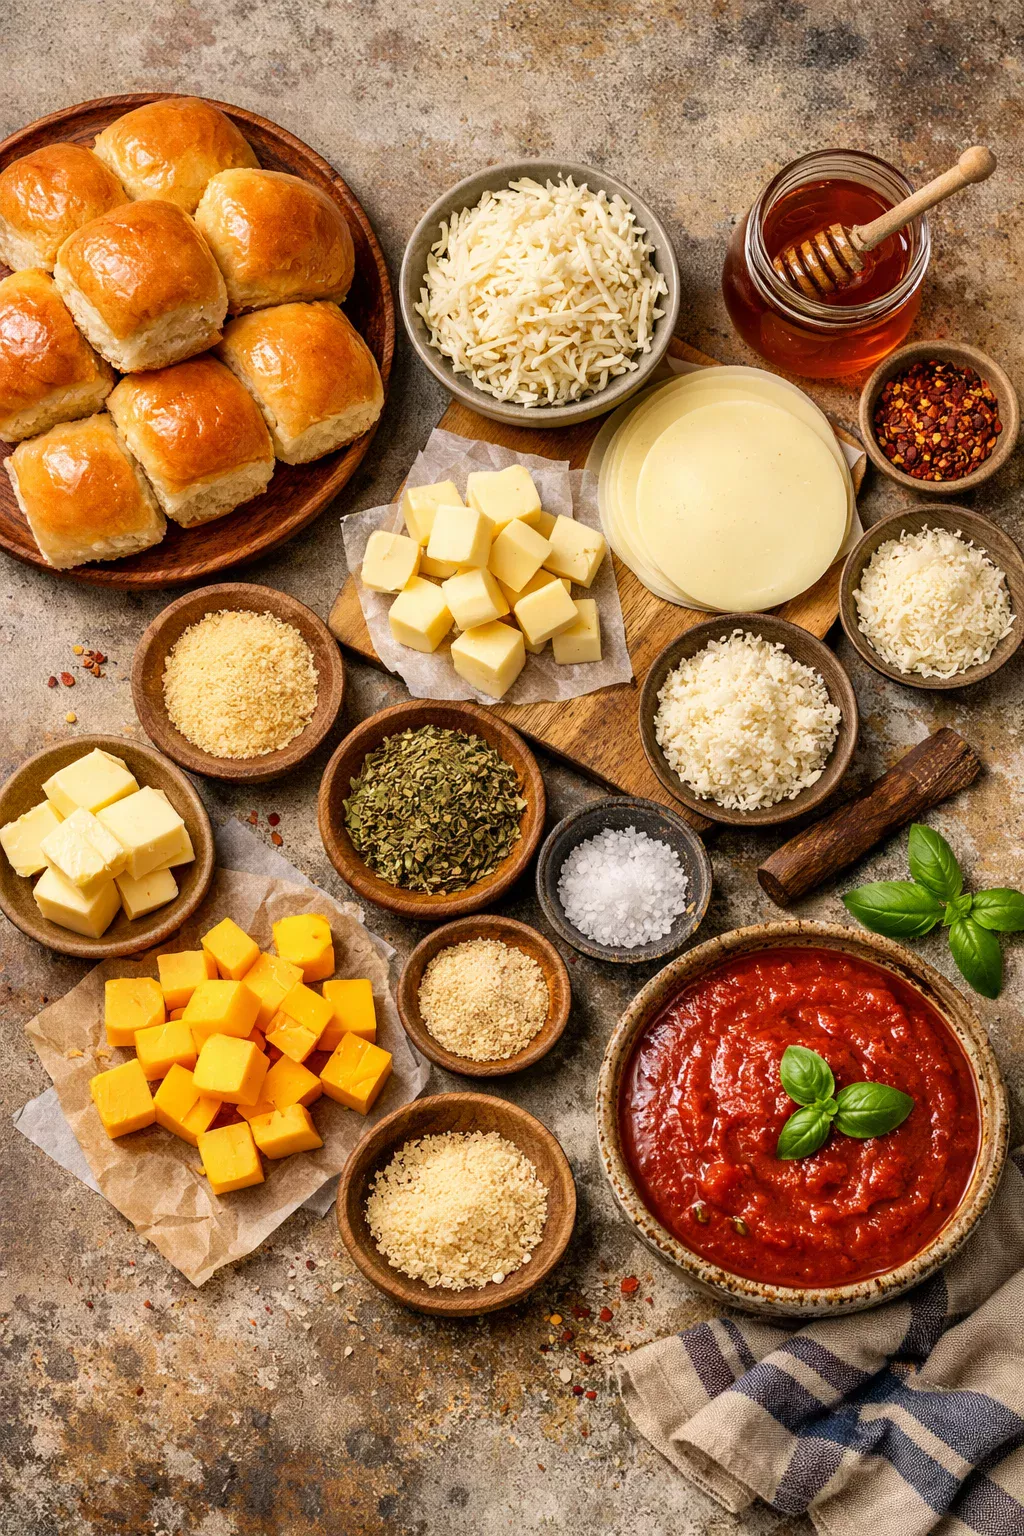
Cheese is where the magic happens, and you’ve got options. My go-to is low-moisture mozzarella because it melts smoothly, gives that dreamy stretch, and doesn’t release too much water. Fresh mozzarella tastes amazing but can add extra moisture, so if you use it, pat it dry and combine with a drier cheese.
Best melty options
Mozzarella is your baseline. Add a bit of provolone for richness or a sprinkle of Monterey Jack for a creamy melt. If you want a sharp, nostalgic pizzeria note, stir in a small handful of finely grated Parmesan or Pecorino. This amps up flavor without messing with the texture.
Flavor boosters
A little cheddar brings color and a more pronounced bite. Just use it sparingly so it doesn’t overpower the classic pizza vibe. If you love a gooey, loaded finish, try a thin hidden layer of cheese under the sauce and another on top of the pepperoni. It locks everything together.
Pro tip: shred your cheese at home whenever possible. Bagged shredded cheese contains anti-caking agents that can stop it from melting seamlessly. Also, if you’re craving extra-cheesy edges, tuck a bit more mozzarella along the perimeter before you put on the top sheet. For more cheese-forward inspiration, check out this fun stuffed crust pizza idea for technique and flavor cues.
Want to go lighter while still getting pizza satisfaction? You could pull ideas from a cauliflower crust pizza approach and keep your cheese portion modest. But if tonight calls for cozy comfort, lean into the melt and enjoy every stringy bite.

Should I cover the Pizza sliders with foil while baking?
Yes, for the first part of baking, cover them loosely with foil. This helps the cheese melt evenly and keeps the tops from browning too quickly. I bake at 350 F for about 15 minutes covered, then uncover and bake another 5 to 7 minutes until the tops are golden and the cheese is bubbling at the sides. If your oven runs hot, check at the 4-minute mark after uncovering so the rolls don’t over-toast.
Before the oven, I brush the tops with a simple garlic butter: melted butter, a pinch of garlic powder, dried Italian herbs, and a tiny sprinkle of salt. If you like a little sweet heat, add a dot of hot honey or a pinch of red pepper flakes to the butter. Brush again lightly when they come out to give the rolls that glossy look.
If you’re short on time or don’t want to heat up the kitchen, sliders also warm nicely in an air fryer in small batches. Keep them together in a block to avoid drying out the edges and reduce the heat a bit. For crispy inspiration and timing, take a peek at these crispy air fryer pizza rolls and adapt the method for your sliders by lowering the temp and watching closely.
“I covered my batch for the first 15 minutes like you suggested, then uncovered for 6 minutes. Perfectly melty center, golden tops, and no burned edges. The garlic butter sent it over the top.” — Mariah, busy mom and Friday night pizza lover
What should I serve with these Pepperoni and Cheese Sliders?
These sliders can be the main event or part of a bigger spread. I like to add a few crunchy, fresh sides and something bright to balance the rich cheese. A simple salad and a tray of roasted veggies go a long way. If you’re keeping with the sweet-savory theme, pineapple pairs beautifully with pepperoni.
- Simple green salad with balsamic vinaigrette
- Caesar salad with lemony dressing
- Roasted broccoli or green beans
- Wedges of fresh pineapple or a quick pineapple salsa
- Warm marinara for dipping
- Garlic Parmesan fries or roasted potato wedges
For a bigger menu, try a themed sheet pan like this juicy, colorful Hawaiian chicken with pineapple and peppers. It brings the tropical notes that play so well with pepperoni and melty cheese, and it’s great if you have a crowd with different tastes.
Popular
Let’s talk about why these are loved and how to make them your own. First, PEPPERONI PIZZA HAWAIIAN ROLLS are fast. You can prep a tray in 10 minutes, bake for around 20, and you’re done. Second, the flavors hit that nostalgic pizza spot while still feeling a little special thanks to the soft, sweet rolls. Third, they pack well and reheat surprisingly well, so they’re game-day friendly and weeknight friendly.
Make-ahead and storage
You can assemble up to 8 hours ahead and refrigerate, tightly wrapped. If you’re baking straight from the fridge, add 2 to 3 minutes to the covered portion of the bake. Leftovers keep in the fridge for up to 3 days. Reheat covered at 325 F until warm, then uncover to crisp the tops. If you’re cooking for low-carb eaters in the family as well, pair your spread with something like an easy low carb pizza casserole so everyone’s happy.
Flavor twists
Try half-pepperoni, half-veggie. Add sliced olives, bell peppers, or mushrooms, but sauté watery veggies first so they don’t dampen the rolls. Pepperoni blends beautifully with pepperoncini or jalapeños if you like a little heat. A sprinkle of dried oregano on top before baking makes them smell and taste like your favorite pizzeria. And if you want a nod to tropical flavors, a few fine-diced pineapple bits tucked under the cheese can be fantastic with the savory meat.
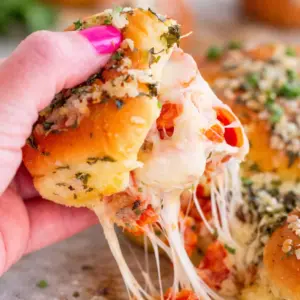
Whatever your spin, PEPPERONI PIZZA HAWAIIAN ROLLS are the kind of meal that gets people hovering in the kitchen, lifting the foil to peek at the bubbling cheese, and asking how soon they can grab one. It’s casual, cozy food at its best.
Common Questions
How much sauce should I use?
Go light. About 3 to 4 tablespoons for a 12-roll sheet is plenty. Spread it thin so the bread doesn’t get soggy. Serve extra sauce on the side for dipping.
What oven temperature works best?
350 F is your sweet spot. It melts the cheese evenly without scorching the tops too quickly. If your oven browns fast, move the rack down a notch.
Can I prep and freeze them?
Yes, assemble without the butter topping, wrap tightly, and freeze for up to a month. Thaw in the fridge overnight, brush with butter, and bake as directed.
How do I get neat slices?
Let them rest for 5 minutes after baking. Use a sharp serrated knife and cut in straight down motions. That rest time helps the cheese set a bit for cleaner edges.
What if I don’t have pepperoni?
Use salami, cooked Italian sausage, or even turkey pepperoni. You can also go meatless with mushrooms and olives. Keep the seasoning bold to mimic that pizzeria punch.
Final bites and an invite to your kitchen
If you’ve ever wanted an easy win that feels special, PEPPERONI PIZZA HAWAIIAN ROLLS are it. Soft rolls, melty cheese, and a golden garlic-butter finish hit every cozy note. If you’d like more inspiration on technique and flavor combos, these takes on sliders are helpful and tasty: the classic style from Pepperoni Pizza Sliders and a gooey, family-tested version from Cheesy Pepperoni Pizza Sliders. I hope you make a pan soon, share it hot from the oven, and enjoy the smiles that follow. Your kitchen is about to smell amazing.
Pepperoni Pizza Hawaiian Rolls
Ingredients
For the Sliders
- 12 rolls Hawaiian rolls Soft, slightly sweet rolls ideal for sliders
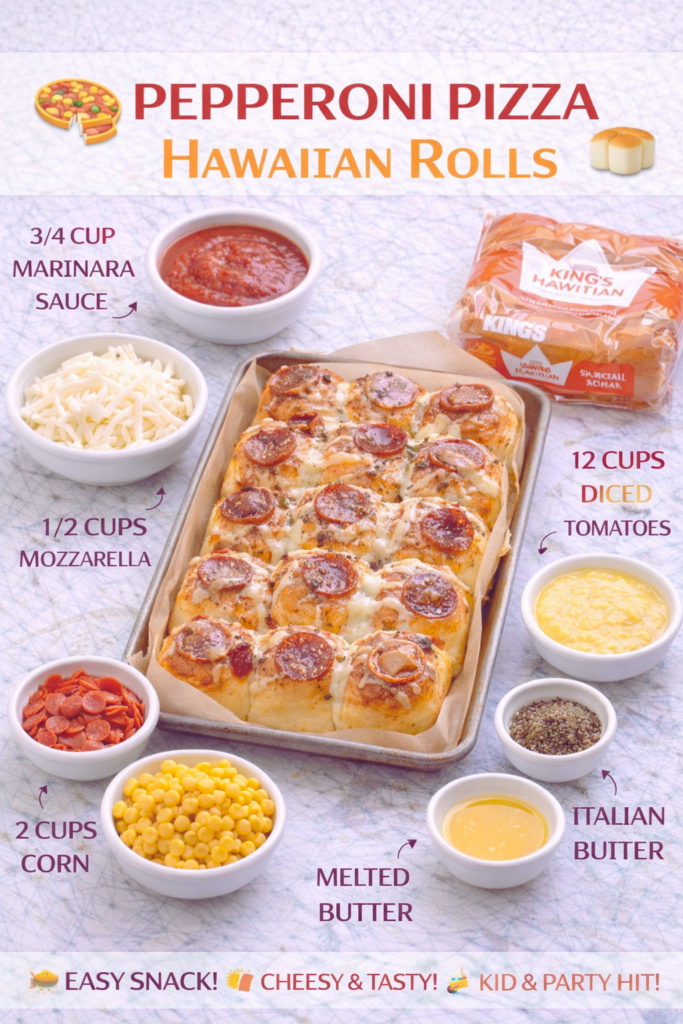
- 1 cup low-moisture mozzarella cheese, shredded For the best melt and stretch
- 1 cup pepperoni slices Can substitute with salami or cooked Italian sausage
- 3-4 tablespoons pizza sauce Spread thinly to prevent sogginess
- 2 tablespoons melted butter For brushing tops before baking
- 1 teaspoon garlic powder Mix into melted butter for flavor
- 1 teaspoon dried Italian herbs For brushing tops before baking
- 1 pinch salt Enhances flavor of the garlic butter
Instructions
Preparation
- Preheat the oven to 350°F (175°C).
- Slice the entire sheet of Hawaiian rolls horizontally without separating them.
- Layer the pizza sauce, mozzarella cheese, and pepperoni evenly on the bottom half of the rolls.
- Brush the tops with melted butter mixed with garlic powder, Italian herbs, and salt.
Baking
- Cover the assembled sliders loosely with foil and bake in the preheated oven for 15 minutes.
- Remove the foil and bake for an additional 5-7 minutes until the tops are golden and the cheese is bubbling.
- Once baked, let the sliders rest for 5 minutes before slicing for neat portions.