

All Question You Need
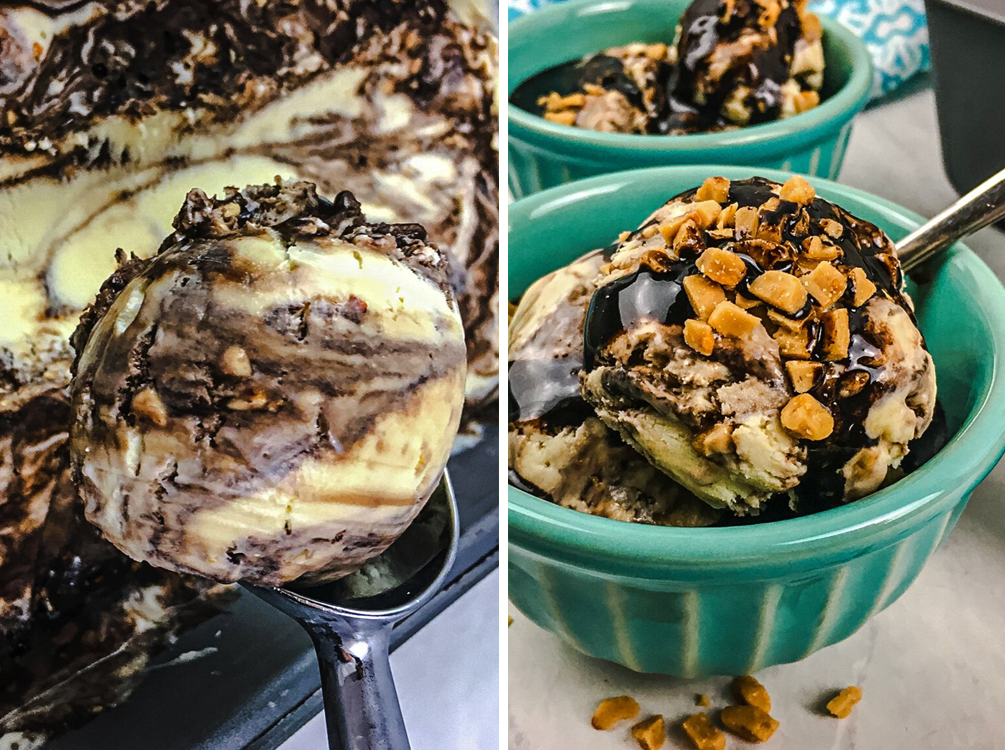
Toffee ice cream is a classic dessert that combines the smooth, creamy goodness of ice cream with the rich, buttery flavor of toffee. It’s the perfect treat for anyone who loves a sweet, indulgent dessert.
Toffee ice cream is made by blending together heavy cream, milk, sugar, and toffee pieces. The mixture is then churned in an ice cream maker until it reaches the perfect consistency. The end result is a velvety smooth ice cream with a slightly crunchy texture from the toffee pieces.
One of the best things about toffee ice cream is its versatility. It can be served on its own, topped with whipped cream or caramel sauce, or used as a base for other desserts like ice cream sundaes or milkshakes.
If you’re feeling adventurous, you can even try making your own toffee ice cream at home
What ingredients do we need to Toffee Ice Cream?
To make Toffee Ice Cream, you will need the following ingredients:
Ingredients:
- 1 cup granulated sugar
- 2 tablespoons water
- 2 cups heavy cream
- 1 cup whole milk
- 4 large egg yolks
- 1 teaspoon vanilla extract
- 1/2 cup toffee bits or crushed toffee candies
How to make best: homemade Toffee Ice Cream?
- Toffee Base: In a medium saucepan, combine heavy cream, whole milk and some granulated sugar. Stir until all the mixture is hot, but avoid boiling.
- Add Toffee Bits: Stir in 1/2 cup of toffee bits into the warm mixture. Continue stirring until the toffee bits are fully melted and incorporated into the base.
- Simmer and Infuse: Allow the mixture to simmer for a few minutes to infuse the toffee flavours.
- Cool the mixture: Let the toffee base cool to room temperature. Place the saucepan over ice to cool quickly, stirring occasionally to prevent souring.
- Add vanilla extract: When the base has cooled, stir in the vanilla extract.
- Chill the Mixture: Cover the toffee base with plastic wrap, making sure it doesn’t turn sour. Refrigerate for at least 4 hours for enhanced flavour.
- Churn the ice cream: Pour the chilled toffee base into an ice cream maker and churn according to the manufacturer’s instructions. This usually takes 15-20 minutes.
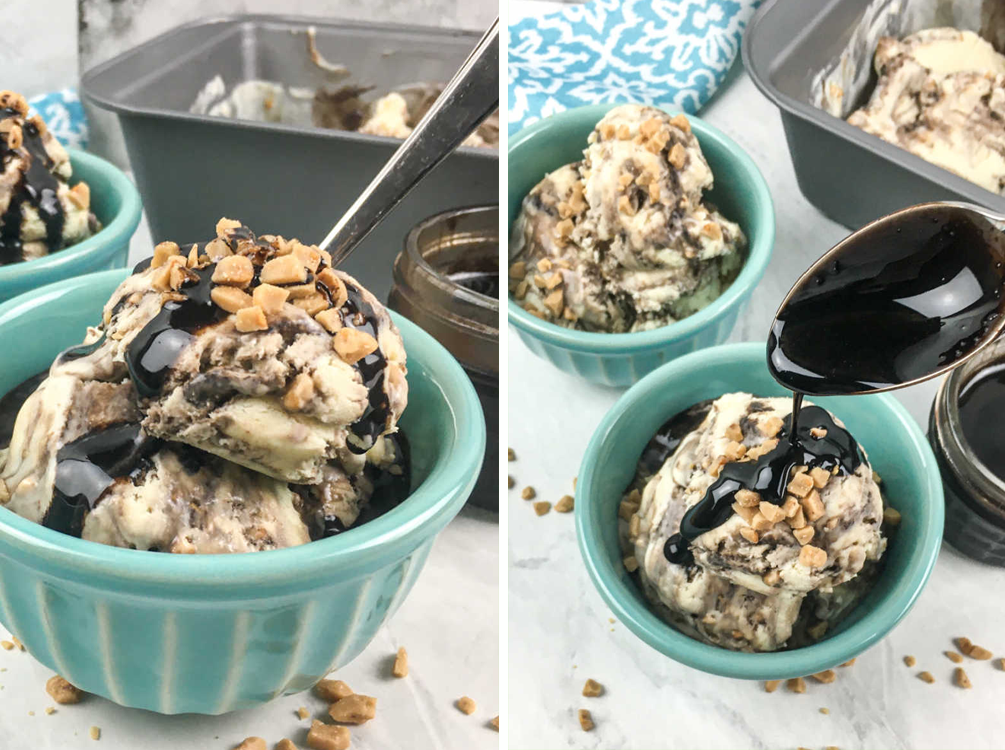
- Add extra toffee bits: During the last few minutes of churning, add 1 cup additional toffee bits to the ice cream. It adds a delightful crunch to every scoop.
- Transfer and freeze: Place the churned toffee ice cream in a lidded container and sprinkle with more toffee bits. Freeze an additional 4 hours or until firm.
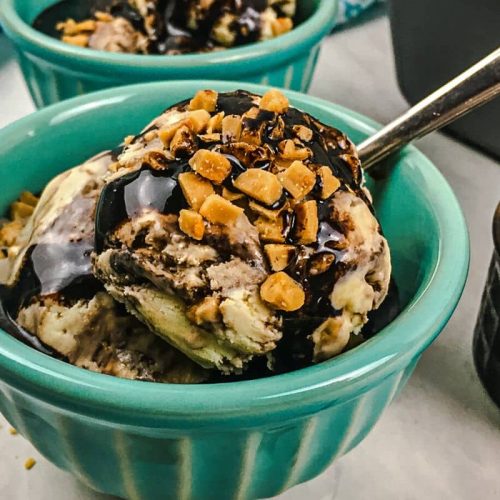
- Serve and enjoy: scoop into toffee ice cream bowls or cones. Garnish with extra toffee bits or drizzle with caramel sauce if desired.
Enjoy your delicious homemade Toffee Ice Cream!
How long does No-Churn Ice Cream keep in the freezer?
No-churn ice cream is a popular type of ice cream that can be made at home without an ice cream maker. It typically consists of heavy cream, sweetened condensed milk, and various flavourings or mix-ins.
In general, no-churn ice cream can be stored in the freezer for up to 2-3 months. However, the exact length of time that it will keep will depend on a variety of factors, such as the ingredients used, the storage conditions, and the amount of air that is incorporated during the freezing process.
To maximize the shelf life of your no-churn ice cream, it is important to store it in an airtight container and keep it at a consistent temperature of 0°F (-18°C) or lower. It is also a good idea to label the container with the date that the ice cream was made, so that you can keep track of how long it has been in the freezer.
Additionally, it is worth noting that no-churn ice cream may become harder and more difficult to scoop as it sits in the freezer. To make it easier to serve, you can let the ice cream sit at room temperature for a few minutes before scooping, or you can microwave it for a few seconds to soften it up.
Can you make other flavors of No-Churn Ice Cream?
Yes, absolutely! One of the great things about no-churn ice cream is its versatility. With just a few simple ingredients, you can create a wide variety of delicious flavors and combinations.
Here are a few ideas for different flavors of no-churn ice cream:
- Chocolate: Add cocoa powder or melted chocolate to the base mixture for a rich, chocolatey flavor.
- Strawberry: Puree fresh strawberries and fold them into the base mixture for a fruity twist.
- Mint chocolate chip: Add a few drops of peppermint extract and chopped chocolate chips to the base mixture for a refreshing treat.
- Cookies and cream: Crush up some chocolate sandwich cookies and fold them into the base mixture for a classic flavor combination.
- Peanut butter: Swirl in some peanut butter or add chopped peanuts to the base mixture for a nutty, satisfying treat.
- Salted caramel: Add some caramel sauce and a pinch of sea salt to the base mixture for a sweet and salty indulgence.
- Lemon: Add some lemon zest and juice to the base mixture for a tart, refreshing flavour.
The possibilities are endless when it comes to making no-churn ice cream! With a little creativity and experimentation, you can create your own unique flavour combinations that are sure to impress.
Which is best: homemade or store-bought caramel sauce?
Whether homemade or store-bought caramel sauce is better really depends on personal preference and the intended use of the sauce.
Homemade caramel sauce can be made with simple ingredients such as sugar, butter, and cream, which allows for customization and control over the final product. The consistency and sweetness can be adjusted to taste, and the use of natural ingredients without preservatives or additives can be appealing to some. Homemade caramel sauce can also be more cost-effective in the long run, as larger batches can be made at once and stored for later use.
On the other hand, store-bought caramel sauce can be more convenient for those who don’t have the time or desire to make their own. It is readily available in most grocery stores and can be used immediately without any prep work. Additionally, store-bought caramel sauce can come in a variety of flavors, such as salted caramel or dark chocolate caramel, which can add extra depth and complexity to dishes.
When it comes to taste, both homemade and store-bought caramel sauce can be delicious, but it ultimately depends on personal preference. Some may prefer the homemade sauce for its fresh taste and ability to customize, while others may enjoy the consistency and convenience of store-bought.
In summary, whether homemade or store-bought caramel sauce is best depends on personal preference and the intended use. It’s always worth trying both and deciding which one you prefer based on taste, convenience, and other factors.
What should I serve with salted caramel ice cream?
Salted caramel ice cream is a delicious treat on its own, but it can also be paired with a variety of complementary flavors and textures to enhance the overall experience. Here are a few ideas for what to serve with salted caramel ice cream:
- Warm chocolate sauce: Drizzle warm chocolate sauce over the ice cream for a decadent and indulgent treat.
- Fresh fruit: Serve the ice cream with sliced bananas, berries, or other fresh fruit for a refreshing and light contrast to the rich caramel flavor.
- Crunchy toppings: Add some texture to the ice cream by sprinkling chopped nuts, crumbled cookies, or even popcorn on top.
- Whipped cream: Top the ice cream with a dollop of whipped cream for a classic and timeless dessert pairing.
- Salted caramel sauce: For an extra dose of caramel flavor, drizzle additional salted caramel sauce over the ice cream.
- Warm baked goods: Serve the ice cream with warm baked goods such as brownies, apple pie, or bread pudding for a comforting and indulgent dessert.
These are just a few ideas for what to serve with salted caramel ice cream, but there are many other possibilities depending on your personal taste and creativity.
How long will this ice cream stay good in the freezer?
Assuming you are referring to salted caramel ice cream, its shelf life in the freezer will depend on several factors, including the quality of the ingredients used, the storage conditions, and the amount of air exposure during the freezing process.
In general, salted caramel ice cream can last in the freezer for up to 2-3 months if stored properly. To maximize its shelf life, store the ice cream in an airtight container, ideally a freezer-safe container with a tight-fitting lid, and keep it at a consistent temperature of 0°F (-18°C) or lower. It’s also a good idea to label the container with the date that the ice cream was made, so you can keep track of how long it has been stored in the freezer.
Over time, ice crystals can form on the surface of the ice cream, making it less creamy and more icy. To minimize the formation of ice crystals, remove the ice cream from the freezer and give it a good stir every 30 minutes during the first few hours of freezing.
In summary, salted caramel ice cream can stay good in the freezer for up to 2-3 months if stored properly. However, for the best quality and taste, it’s recommended to consume the ice cream within the first few weeks of freezing.
No Churn Toffee Ice Cream Recipe
Ingredients
- 2 cups heavy cream
- 1 cup whole milk
- 1 cup sugar
- 1 cup toffee pieces
Instructions
- In a medium saucepan, combine the heavy cream, milk, and sugar. Heat the mixture over medium heat, stirring occasionally, until the sugar has dissolved.
- Remove the pan from the heat and stir in the toffee pieces. Allow the mixture to cool to room temperature.
- Once the mixture has cooled, pour it into an ice cream maker and churn according to the manufacturer's instructions.
- Once the ice cream is finished churning, transfer it to a freezer-safe container and freeze for at least 2 hours before serving.