

Dr. Pepper Ribs Recipes saved me on a busy weeknight when I wanted something special without fuss. You know those evenings when you crave sticky, tender ribs that taste like a summer cookout, but you also want to keep things easy and doable. That is where this recipe shines. It is sweet and tangy with a little peppery kick, and it pairs with almost anything. I will show you simple steps, real tips that actually help, and how to get that glossy glaze that makes everyone lick their fingers. Let’s make ribs that taste like you babysat them all day, even if you did not
How to Make Dr. Pepper Ribs
What you need and how to prep
I like baby back ribs for this because they cook a bit faster and get super tender. St. Louis style works too and has a meatier bite. The key is removing the thin membrane on the back so flavor can get in and the ribs have that bite-through quality instead of a chew. Use a paper towel to grab a corner of the membrane and pull it off. It is not glamorous, but it is worth it.
For the flavor, I keep a simple dry rub and a quick sauce using Dr Pepper. The soda brings caramel notes, a little cherry vibe, and that signature spice that plays beautifully with pork. Here is what I use most often:
- 2 racks baby back ribs, membrane removed
- 2 teaspoons kosher salt and 1 teaspoon black pepper
- 1 teaspoon garlic powder and 1 teaspoon onion powder
- 1 teaspoon smoked paprika
- 1 can Dr Pepper, divided
- 1 cup ketchup
- 2 tablespoons brown sugar
- 1 tablespoon Worcestershire sauce
- 1 tablespoon apple cider vinegar
- Optional: pinch of red pepper flakes for heat
Pat the ribs dry. Rub them all over with salt, pepper, garlic, onion, and smoked paprika. Let them sit while you make the sauce. Combine 3/4 can of Dr Pepper, ketchup, brown sugar, Worcestershire, and vinegar in a saucepan. Bring to a gentle simmer and cook 12 to 15 minutes until slightly thickened. It should coat a spoon. Reserve a cup for glazing and keep the rest for basting.
As for cooking, you can use your oven, grill, smoker, slow cooker, or pressure cooker. I will outline times below. No matter which you choose, the flow is simple: season, cook low and slow until tender, then glaze and finish hot to set the sauce. That last high-heat blast is where the magic happens. The sugars bubble, the edges get sticky, and the ribs look glossy and irresistible.
If you are into pressure cooking, I have a full category of ideas for speedy dinners. Check out my Instant Pot recipes for more weeknight inspiration when you want big flavor without waiting.
Pro tip: Use a wire rack and a foil-lined sheet pan to keep cleanup easy. And do not drown the ribs in sauce too early. Glaze in layers during the last 15 minutes of cooking for the best shine and stickiness.
What to Serve with Dr. Pepper Ribs
Once your ribs are resting and that smell is floating through your kitchen, you need sides. I like to mix something crisp with something cozy. Here are simple combos that never miss.
Simple sides that play nicely
Go fresh: chopped coleslaw, crunchy cucumber salad, or a light tomato and red onion salad. Go cozy: skillet cornbread, buttery mashed potatoes, or smoky baked beans. If you want a lighter plate, a big tray of mixed greens with a lemony dressing and some charred corn is perfect. I also reach for mushrooms because they soak up any leftover glaze like a sponge. These air fryer mushrooms turn out caramelized on the edges and tender in the middle, and they make a great quick side while the ribs finish.
Prefer a low-carb spread that still feels full? Browse my curated list of low carb recipes for salads, veggie sides, and weeknight-friendly meals that keep things light without losing the fun.
Serving tip: When you slice the ribs, do it bone-side up so you can see where to cut. Toss the pieces in a little warm sauce before plating for extra shine.

Cooking Time and Methods for Dr. Pepper Ribs
Different tools, same goal: tender ribs with a lacquered finish. Here is how to time it out depending on what you have and how much time you want to spend.
Oven, grill, slow cooker, and pressure cooker timing
Oven method: Preheat to 300 F. Place seasoned ribs on a rack over a foil-lined sheet and cover loosely with foil. Cook 2.5 to 3 hours until a toothpick slides in easily. Remove foil, brush with sauce, and bake 10 to 15 more minutes at 425 F to set the glaze. Broil 1 to 2 minutes if you want a deeper caramel edge. Keep an eye on it so the sauce does not scorch.
Grill method: Set up for indirect heat at 275 to 300 F. Cook 2.5 to 3 hours until tender, flipping once halfway. Move ribs over direct heat, brush with sauce, and grill 5 to 8 minutes, flipping and glazing until sticky. Close the lid between turns so the sauce sets.
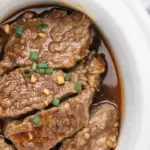
Slow cooker method: Cut racks to fit. Add 1/2 cup Dr Pepper to the pot. Layer ribs with a light brush of sauce. Cook on low 6 to 8 hours or high 3.5 to 4.5 hours until tender but not falling apart. Transfer to a sheet pan, brush with more sauce, and broil 3 to 5 minutes per side to caramelize. If slow cooker ribs are your happy place, you will also love these tender slow cooker baby back ribs that melt right off the bone.
Instant Pot or pressure cooker method: Use a trivet and pour 1 cup Dr Pepper or water in the pot. Pressure cook on high for 25 to 30 minutes for baby backs, then natural release 10 minutes. Glaze and broil 3 to 5 minutes per side to finish.
How to tell when ribs are done: A toothpick should slide in between the bones with little resistance. The meat should bend and just start to crack when you lift from the middle with tongs. And the bones may peek out slightly at the ends.
Essential BBQ Tools and Ingredients
You do not need a fancy setup to nail these ribs, but a few basics will make your life easier and the results more consistent.
- Rimmed sheet pan and wire rack for even cooking
- Heavy-duty foil to keep moisture in and cleanup simple
- Basting brush for layering sauce
- Instant-read thermometer for other meats and sanity checks
- Tongs with a firm grip so you do not tear the meat when flipping
- Smoked paprika and apple cider vinegar to boost depth
- Dr Pepper for the sauce and a splash for the pot or pan
Optional but helpful: a grill for finishing, or a broiler set on high for that glossy glaze. A small saucepan for reducing the sauce is key. Let it simmer gently until thick enough to coat the back of a spoon. If you like to branch out after ribs night, I have a juicy, sweet-savory dinner idea I adore: this sheet pan Hawaiian chicken that packs color and flavor without extra dishes.
Reader Reviews and Tips
I have made these ribs for family nights, tailgates, and random Tuesdays when I needed a pick-me-up. Every time, I get requests for the sauce recipe and leftovers vanish quickly. A couple of reader notes that might help you too:
Make ahead: Rub the ribs the night before, then cook the next day. The spices get deeper and the meat tastes richer. You can also make the sauce up to 4 days ahead and keep it in the fridge.
Glaze smart: Start with a thin layer, let it set, then add another. Thin layers give you that shiny finish without burning.
Sauce control: If you want less sweetness, swap some ketchup for tomato sauce and cut the brown sugar in half. If you want more kick, add a splash of hot sauce or a pinch of cayenne.
We tried the ribs last weekend and my husband said they tasted like a backyard cookout from a restaurant. The glaze was sticky and perfect, and the meat pulled from the bone with a gentle tug. This is our new go-to rib recipe.
Why these ribs work
The combo of gentle heat and a flavorful sauce lets the meat stay juicy while building layers of sweet, tangy, and savory notes. The Dr Pepper reduction adds body to the sauce so it clings to the ribs instead of sliding off. Plus, finishing under high heat gives you those caramelized edges that make your fingers shiny and happy.
Common Questions
Can I use diet Dr Pepper for the sauce?
You can, but the sauce will be thinner and may not caramelize the same. Add an extra tablespoon of brown sugar or simmer longer to thicken.
Do I need to remove the membrane?
Yes, if you can. It helps seasonings penetrate and gives a better bite. If it fights you, score it with a knife in a crosshatch pattern to help tenderize.
What if my ribs are done early?
Wrap them in foil and keep warm in a 170 F oven for up to an hour. Glaze and broil right before serving so they stay shiny and fresh.
Can I smoke these instead?
Absolutely. Smoke at 225 to 250 F for 4.5 to 5.5 hours, spritz with a bit of Dr Pepper or apple juice, then glaze in the last 30 minutes.
How do I store and reheat leftovers?
Refrigerate up to 4 days. Reheat covered at 300 F for 15 minutes, then uncover and brush a little extra sauce for 5 minutes to refresh the glaze.
Let’s Get Sticky and Happy at Dinner
Alright, you are set. You have the rub, the sauce, the timing for every kitchen tool, and the confidence to get that shiny finish. If you like discovering different spins, you might enjoy this ultra simple take with just a few pantry items: Slow Cooker Dr. Pepper BBQ Ribs – Only 3 Ingredients!. And for another trusted approach with a slightly different balance of sweet and tang, peek at the Dr. Pepper Ribs Recipe – Food.com. However you cook them, keep the heat gentle, glaze in layers, and let the sauce do its smoky-sweet thing. If tonight is not a ribs night, no problem. Save this, and maybe explore one-pan favorites or quick stovetop dishes like my weeknight skillet picks. Either way, I hope this becomes one of those Dr. Pepper Ribs Recipes you pull out again and again when you want big flavor with low stress.
Dr. Pepper Ribs
Ingredients
For the Ribs
- 2 racks baby back ribs, membrane removed St. Louis style can be used as a substitute.
- 2 teaspoons kosher salt
- 1 teaspoon black pepper
- 1 teaspoon garlic powder
- 1 teaspoon onion powder
- 1 teaspoon smoked paprika
- 1 can Dr Pepper, divided
- 1 cup ketchup
- 2 tablespoons brown sugar
- 1 tablespoon Worcestershire sauce
- 1 tablespoon apple cider vinegar
- pinch red pepper flakes Optional for heat
Instructions
Preparation
- Pat the ribs dry and remove the thin membrane on the back of the ribs.
- Rub the ribs all over with salt, pepper, garlic powder, onion powder, and smoked paprika. Let them sit while making the sauce.
Making the Sauce
- In a saucepan, combine 3/4 can of Dr Pepper, ketchup, brown sugar, Worcestershire sauce, and apple cider vinegar.
- Bring to a gentle simmer and cook for 12 to 15 minutes until slightly thickened.
- Reserve 1 cup of the sauce for glazing and keep the rest for basting.
Cooking the Ribs
- Choose your cooking method: oven, grill, smoker, slow cooker, or pressure cooker.
- For oven method: Preheat to 300 F. Place seasoned ribs on a rack over a foil-lined sheet and cover loosely with foil. Cook for 2.5 to 3 hours until tender.
- Remove foil, brush with sauce, and bake for an additional 10 to 15 minutes at 425 F to set the glaze.
- For the grill: Set up for indirect heat at 275 to 300 F and cook for 2.5 to 3 hours, flipping once halfway.
- For the slow cooker: Add 1/2 cup Dr Pepper to the pot, layer in ribs, and cook on low for 6 to 8 hours or high for 3.5 to 4.5 hours.
- For pressure cooker: Pressure cook on high for 25 to 30 minutes and then natural release for 10 minutes.
Finishing
- Glaze the ribs for the last 15 minutes of cooking for the best shine.
- Broil for 1 to 2 minutes for additional caramelization if desired.