
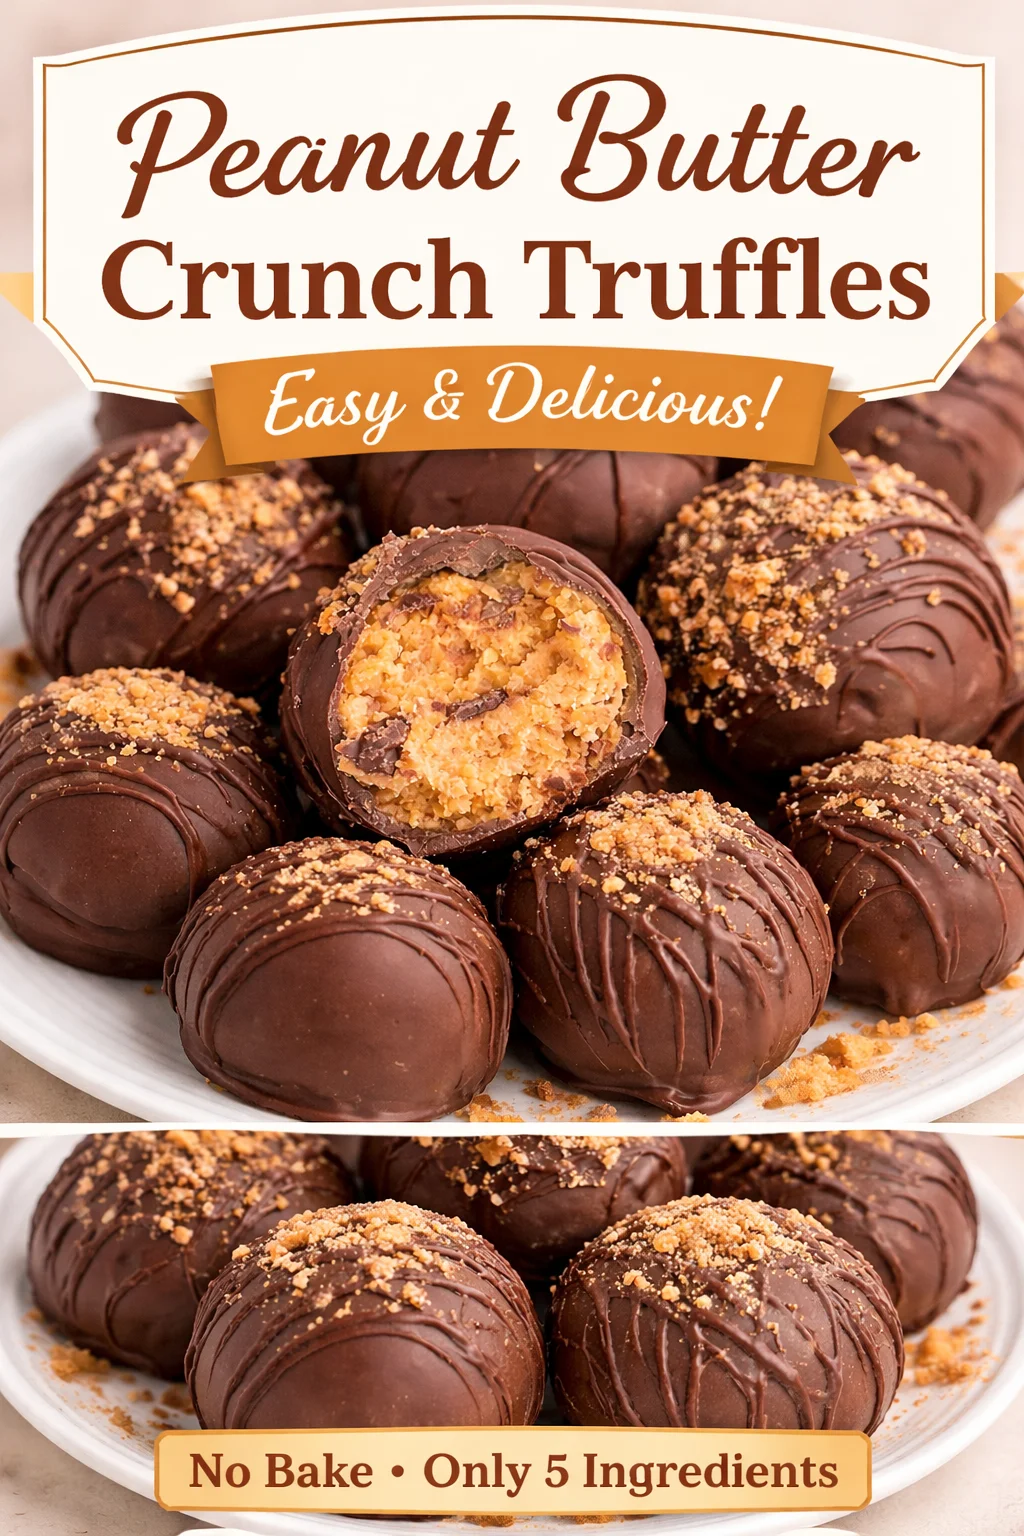
Butterfinger Balls are my go to move when I need a quick dessert that feels like a treat but does not turn my kitchen into a disaster zone. You know those days when you want something sweet after dinner, but you do not want to bake a whole cake and then feel responsible for eating it for a week? Yeah, this is for that. These little bites are crunchy, creamy, chocolatey, and honestly kind of addictive. I started making them for game days and holiday trays, and now people straight up ask if I am bringing them. If you have a soft spot for peanut butter and chocolate, you are in the right place.
Butterfinger Truffles
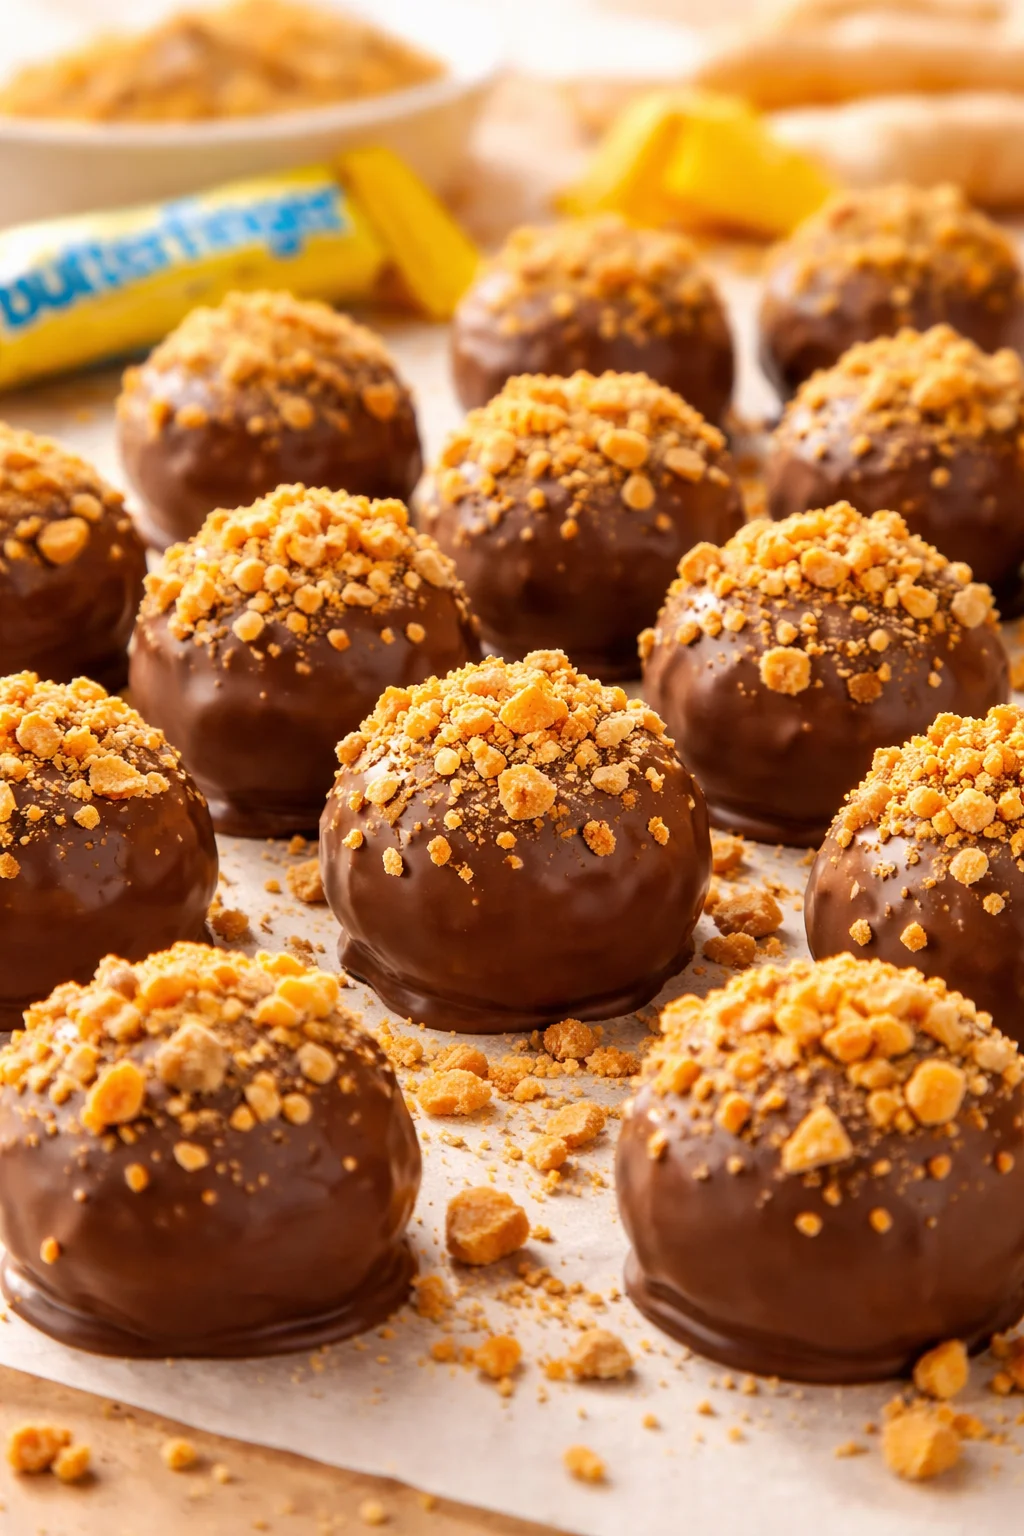
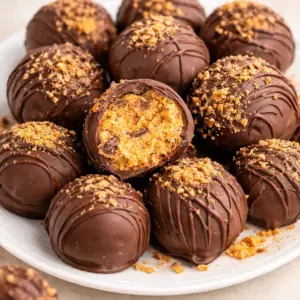
So here is the vibe. Butterfinger truffles are basically the slightly fancier way to say Butterfinger Balls, but they are the same delicious idea. You mix up a peanut buttery center, roll it into bite sized balls, and dip them in melted chocolate. The center tastes like that classic candy bar flavor thanks to crushed Butterfinger, and you get this perfect little crunch in every bite.
I love making these when I am also meal planning real food, because they are no bake and easy to knock out while something else is going. Like if I have a cozy dinner going, I might toss on something like easy crockpot pasta and meatballs earlier in the day and then handle dessert later without stress.
Here is what makes them feel special without being fussy:
- No oven, so your kitchen stays chill.
- Freezer friendly, so you can make them ahead.
- Party friendly, because they travel well and look cute on a tray.
- Kid friendly, because rolling the balls is basically a craft project.
Also, let us be real, people see chocolate dipped anything and assume you worked harder than you did. I will not correct them.
Variations/Substitutions
I have made Butterfinger Balls a bunch of different ways depending on what I had in the pantry or who I was making them for. The base recipe is forgiving, so do not stress if you need to swap something.
Easy swaps that still taste amazing
If you want to tweak things, here are a few ideas that actually work:
Chocolate options: Milk chocolate is the classic, but semi sweet keeps them from being overly sweet. White chocolate is fun too, especially with a little sprinkle on top.
Peanut butter: Regular creamy peanut butter is best for texture. Natural peanut butter can work, but it tends to be softer and oily, so you may need extra crushed cookies or chill time.
Butterfinger alternatives: If you cannot find Butterfinger, you can use any crunchy peanut butter candy, but the flavor will shift. Still tasty, just different.
Gluten free: Most of the time, Butterfinger is gluten free, but always check the label. If you use cookie crumbs in your mix, choose a gluten free cookie. I do a similar check when making dinner, like when I use a recipe such as deliciously easy gluten free meatballs for friends who need that option.
Extra crunch: Add a spoonful of crispy rice cereal to the filling. It sounds odd, but it gives a really nice bite.
One more thing I love is topping them. A pinch of flaky salt, a drizzle of peanut butter, or extra crushed Butterfinger on top makes them look bakery cute with almost zero effort.
How to Make Butterfinger Balls
This is the part where you realize you can totally do this. The steps are simple, and you do not need special tools. I use one bowl, a spatula, and a baking sheet lined with parchment paper. If you have a cookie scoop, it makes them more even, but it is not required.
What you will need
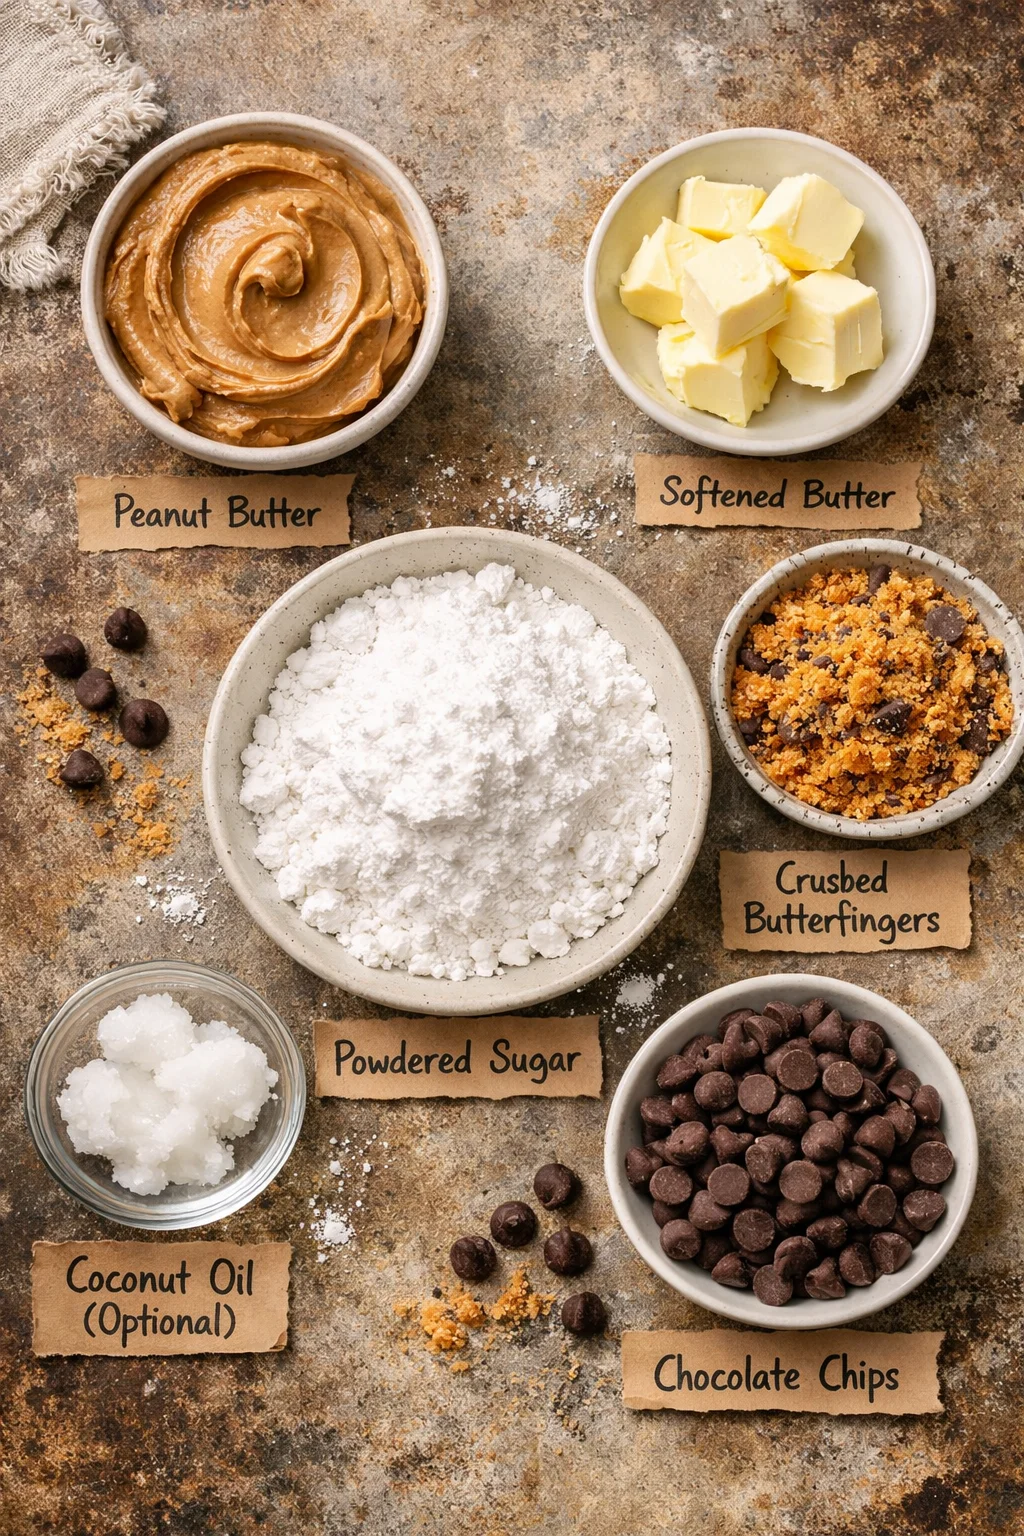
- 1 cup creamy peanut butter
- 4 tablespoons butter, softened
- 2 cups powdered sugar
- 1 1/2 cups crushed Butterfinger candy (plus a little extra for topping if you want)
- 2 cups chocolate chips or melting wafers
- 1 teaspoon coconut oil or shortening (optional, helps chocolate dip smoother)
Directions, the simple way
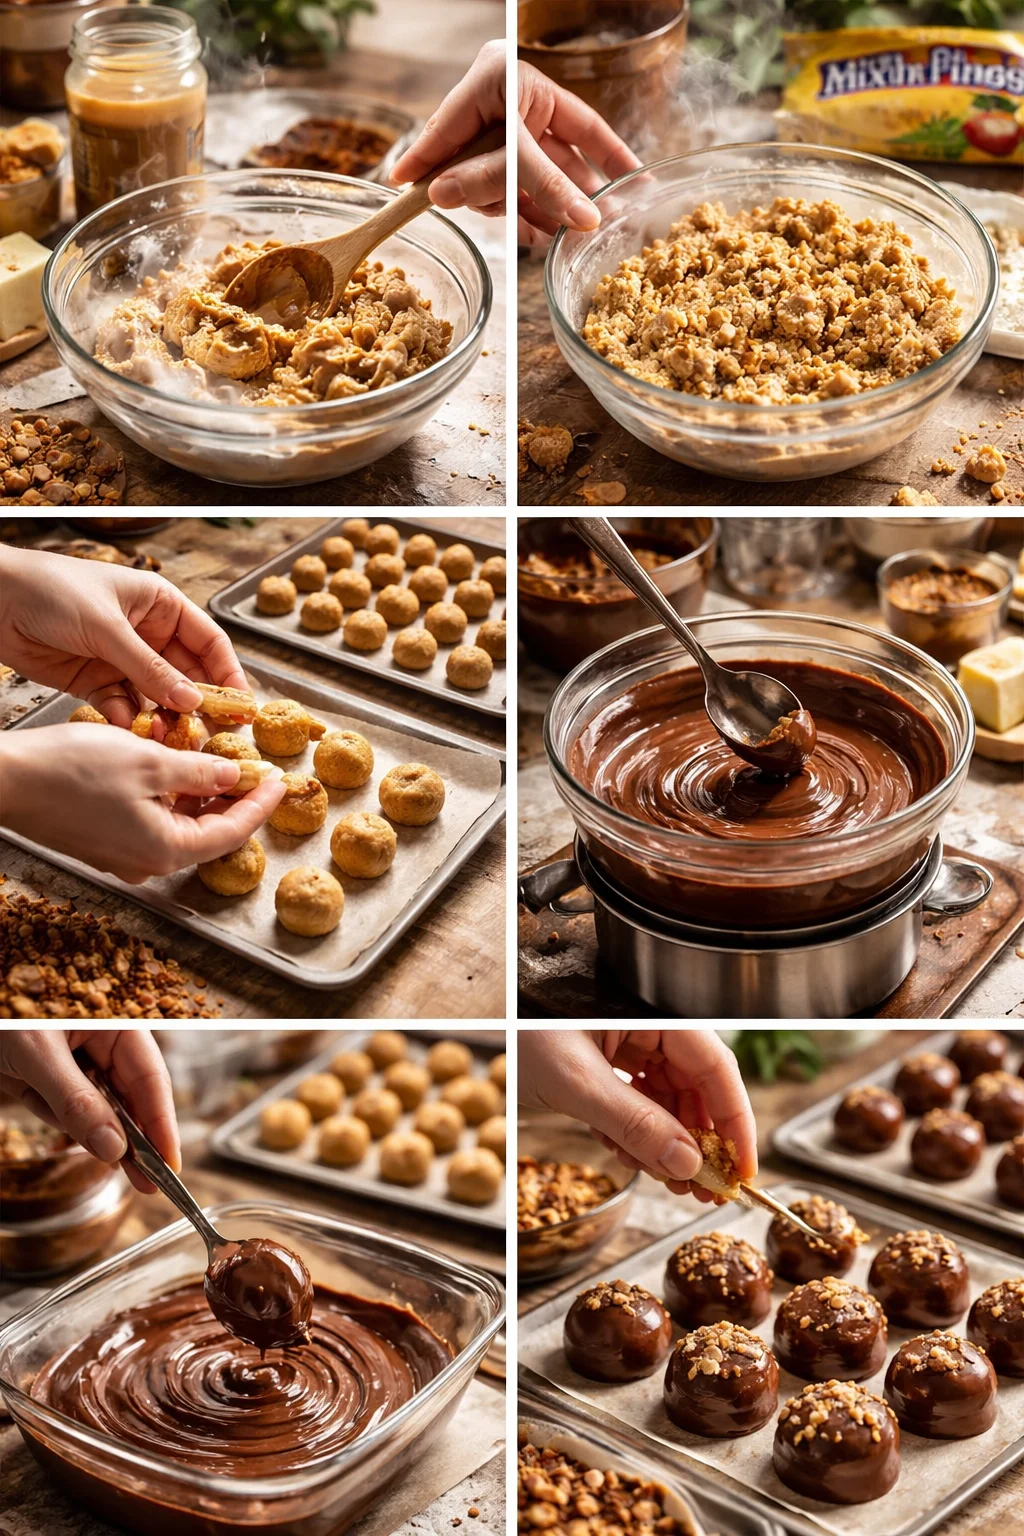
1) In a large bowl, mix peanut butter and softened butter until smooth.
2) Add powdered sugar and stir. It will look crumbly at first, then come together. Keep going.
3) Stir in the crushed Butterfinger. This is where the magic happens, and it starts smelling like candy shop goodness.
4) Scoop and roll into small balls. I aim for about 1 inch, so they are truly poppable.
5) Place them on a parchment lined tray and chill for 30 to 45 minutes. This helps them hold up when dipping.
6) Melt your chocolate in the microwave in short bursts, stirring between. If you add coconut oil, the chocolate gets a smoother finish.
7) Dip each ball in chocolate, let excess drip off, then place back on the tray. Sprinkle with extra crushed Butterfinger if you want them to look extra fun.
8) Chill again until the chocolate sets.
That is it. If you can stir and roll, you can make Butterfinger Balls.
“I made these for my office potluck and they disappeared in like ten minutes. Two people asked for the recipe before I even got a plate.”
And hey, if you are planning a full spread for a party, I love pairing these with something warm and savory. I have done them alongside delicious instant pot spaghetti and turkey meatballs for a casual crowd and it was such an easy win.
Tips
I have learned a few things from making these on repeat, including the time I got impatient and tried to dip them too soon. Spoiler, it was messy. Here are my best practical tips so yours come out pretty and stress free.
Chill the balls before dipping. If the filling is warm, the chocolate can slide off or the balls can fall apart in the chocolate.
Crush the Butterfinger well. Big chunks can make rolling harder. I put the candy in a zip top bag and use a rolling pin, or honestly a heavy mug works too.
Use a fork for dipping. Drop the ball in, lift with a fork, tap gently on the bowl edge, then slide it onto parchment. If you want cleaner bottoms, you can use a toothpick, but the fork method is easier for me.
Work in batches. Keep some balls in the fridge while dipping the others. It keeps everything firm.
Do not overheat the chocolate. Melt slowly and stir often. Burnt chocolate is heartbreaking and it also smells weird.
If you are making these for a holiday, I suggest doing them the day before so you are not rushing. I do the same kind of planning when I make slow cooker party food, like deliciously easy slow cooker cranberry meatballs. Make ahead is sanity saving.
Storage Instructions for Butterfinger Balls
One of the best things about Butterfinger Balls is that they store like a dream. So you can make them early, hide them from your family if necessary, and pull them out when you need a quick dessert.
In the fridge: Store them in an airtight container for up to 1 week. I like to layer parchment paper between layers so they do not stick together.
In the freezer: Freeze in a freezer safe container for up to 2 to 3 months. Let them thaw in the fridge or on the counter for a bit before serving. They are also weirdly good slightly frozen, kind of like a candy bar bite.
At room temperature: If your house is cool, they can sit out for a couple of hours at a party. If it is warm, keep them chilled so the chocolate does not get soft.
If you are gifting them, use mini cupcake liners in a small box. It makes them look fancy without extra work.
Common Questions
1) Do Butterfinger Balls need to be refrigerated?
They do not have to be 24 seven, but I recommend it. The texture stays firm and the chocolate holds up better.
2) Why are my balls too soft to roll?
Usually it is from warm butter or runny peanut butter. Chill the mixture for 15 to 20 minutes, then try again. You can also add a bit more powdered sugar.
3) Can I make them without powdered sugar?
Powdered sugar helps bind and sweeten the filling, so it is tricky to skip. If you want less sweetness, use semi sweet chocolate and do not add extra toppings.
4) How do I crush Butterfinger without making a mess?
Put the candy in a sealed zip top bag and crush with a rolling pin. Let the candy sit for a minute first if it is cold, since it can be extra hard straight from the fridge.
5) Can I use almond butter instead of peanut butter?
Yes, but the flavor will change and the texture can be softer. Chill more and consider using a thicker chocolate coating to help them hold up.
A sweet little sign off
If you make these Butterfinger Balls once, I honestly think they will end up on your regular dessert list. They are simple, they taste like a candy bar in bite form, and they make you look like you really showed up for the occasion. If you want to compare ideas or see other takes, check out Butterfinger Balls – To Simply Inspire and Butterfinger Balls (Butterfinger Buckeye Balls) – Plain Chicken because it is always fun to see different little twists. Now go grab that bag of candy bars and make a batch, and do not be surprised if you end up hiding a few for yourself.
Butterfinger Balls
Ingredients
For the filling
- 1 cup creamy peanut butter Regular creamy peanut butter is best for texture.
- 4 tablespoons butter, softened Softened butter helps create a smooth mixture.
- 2 cups powdered sugar Helps to bind and sweeten the filling.
- 1.5 cups crushed Butterfinger candy Add extra for topping if desired.
For the chocolate coating
- 2 cups chocolate chips or melting wafers Milk chocolate for the classic taste or semi-sweet for less sweetness.
- 1 teaspoon coconut oil or shortening Optional, helps chocolate dip smoother.
Instructions
Preparation
- In a large bowl, mix peanut butter and softened butter until smooth.
- Add powdered sugar and stir until the mixture comes together.
- Stir in the crushed Butterfinger until evenly distributed.
- Scoop and roll the mixture into small balls, about 1 inch in diameter.
- Place them on a parchment-lined tray and chill for 30 to 45 minutes.
Dipping
- Melt your chocolate in the microwave in short bursts, stirring between each.
- Dip each ball in chocolate, letting excess drip off before placing back on the tray.
- Sprinkle with extra crushed Butterfinger if desired.
- Chill again until the chocolate sets.