
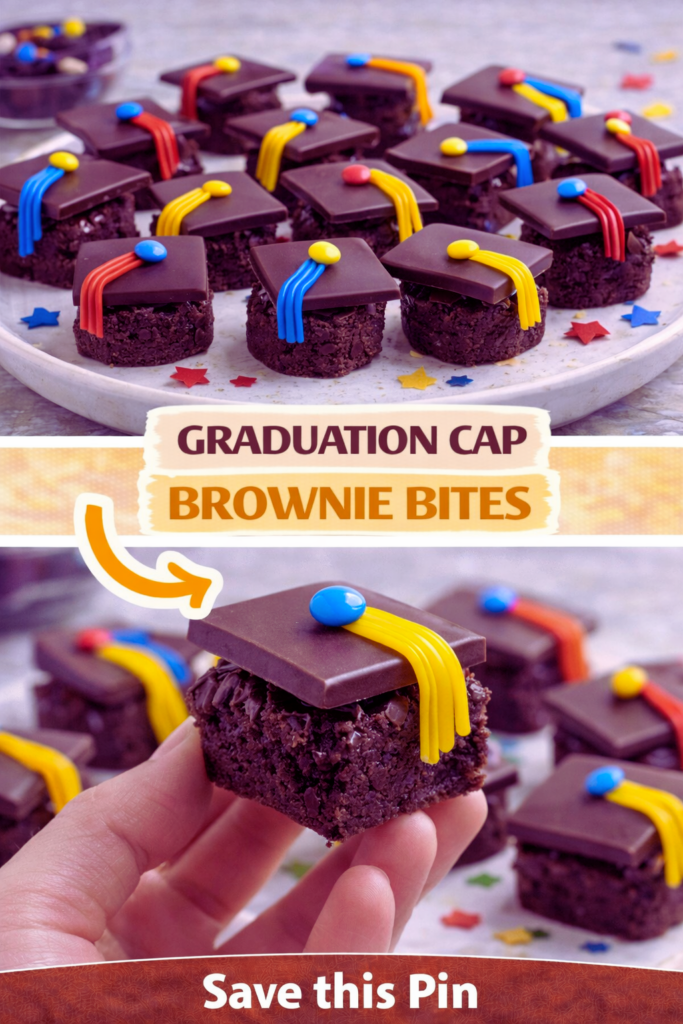
Graduation Cap Brownie Bites are my go to treat when you need something cute, chocolatey, and party ready without stressing out in the kitchen. If you have a graduation party coming up, you already know the vibe: lots of people, lots of photos, and you want desserts that look like you tried really hard, even if you did not. These little brownie caps are exactly that kind of win. They are bite sized, easy to serve, and they disappear fast, so you might want to make a double batch. I started making them for family graduations, and now friends text me asking, are you bringing the caps again?
Why I love this recipe
First, they are genuinely fun to make. You get the rich brownie base, then you decorate them into tiny graduation caps that make everyone smile. Second, you do not need fancy tools. If you can bake brownies and use a little frosting like glue, you can handle this.
I also like that Graduation Cap Brownie Bites are easy to scale up. One pan of brownies plus a bag of candies and you can make a whole tray for a crowd. And because they are bite sized, people can grab one while they are chatting, holding a plate of food, or balancing a drink.
Another reason I love them is they fit in with other party bites. If you are doing a snack table too, I like mixing sweet and savory. I have done a spread with these brownie caps next to cranberry brie bites, and it looks like you hired help, I promise.
The last thing is they travel well. Put them in a container in a single layer, keep them cool, and you are set. I have brought Graduation Cap Brownie Bites to schools, backyards, and crowded living rooms, and they still look adorable when you open the lid.
What you need
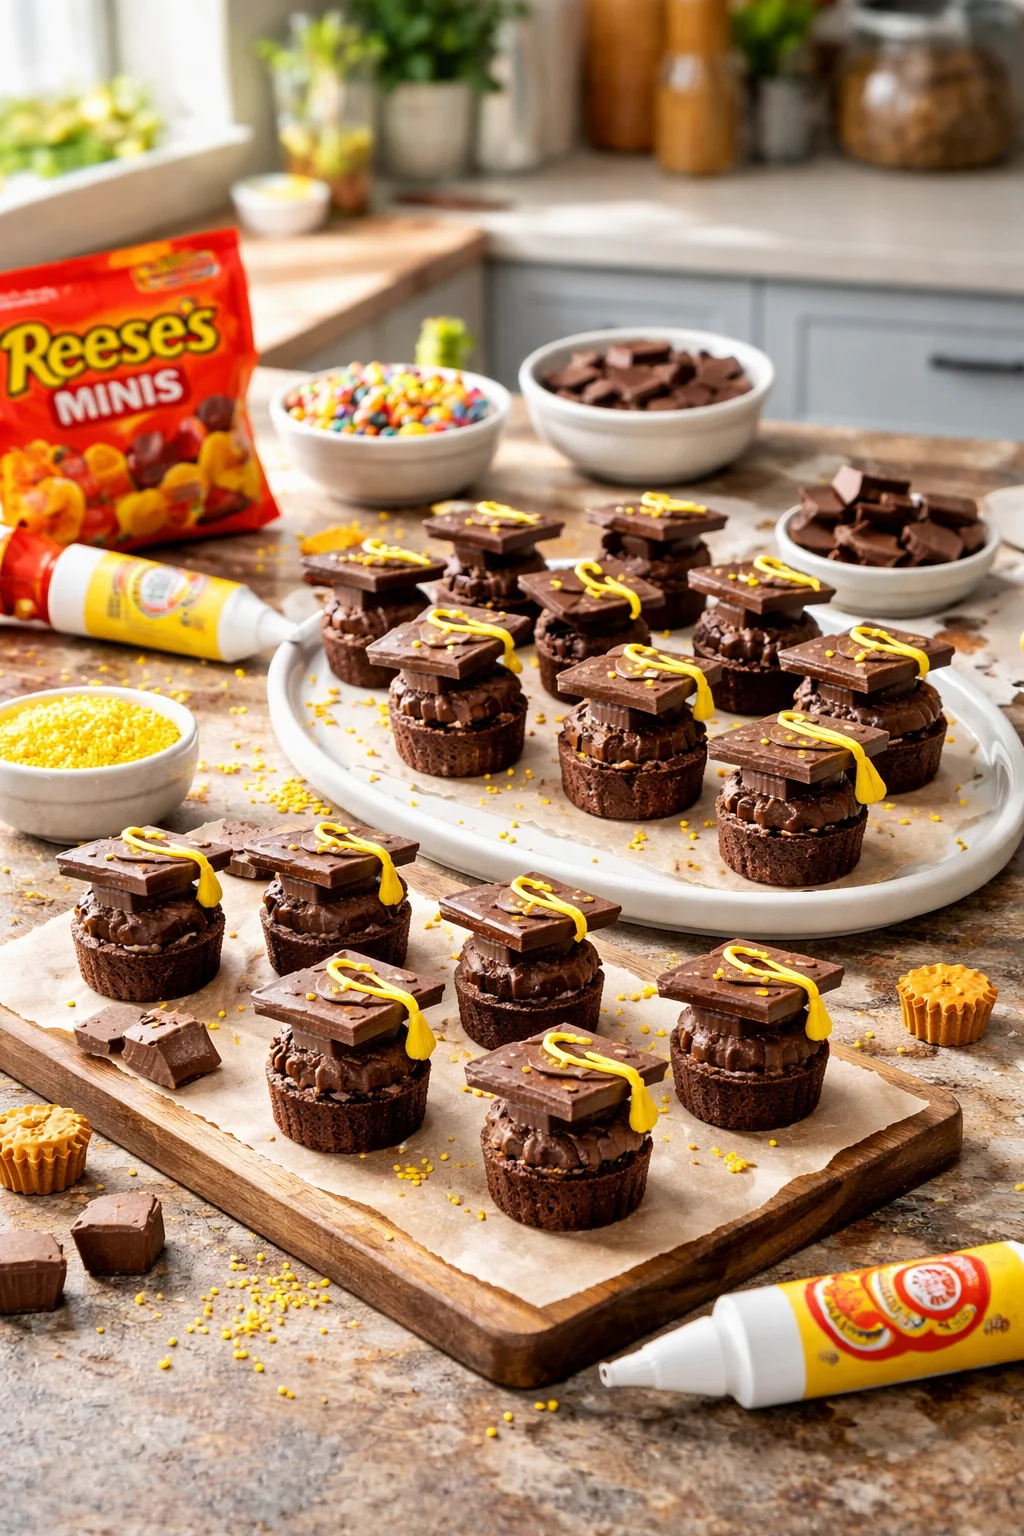
I am keeping this list realistic. You can make your own brownies from scratch, but I am totally fine with boxed mix when life is busy. I have done both, and no one complained either way.
Simple shopping list
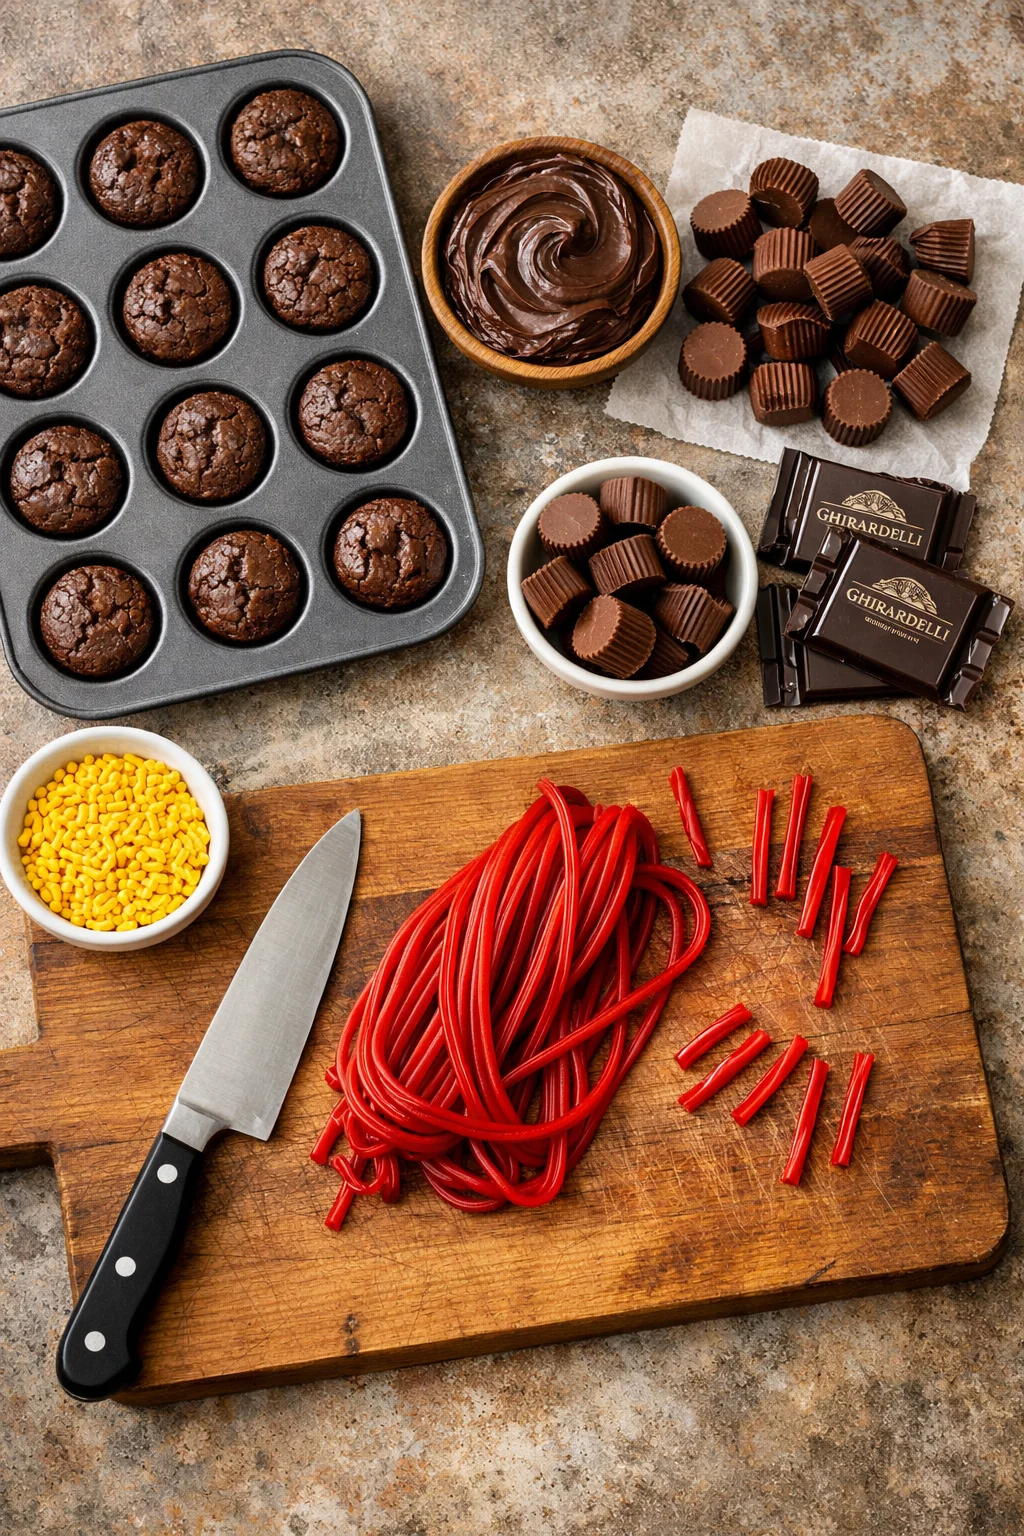
- Brownies: baked in a pan and cooled completely (box mix or homemade)
- Chocolate squares: like Ghirardelli or any thin chocolate squares for the cap top
- Mini peanut butter cups: unwrapped, these become the hat base
- Frosting: chocolate or vanilla, for sticking pieces together
- Yellow candy: mini M and Ms, small jelly beans, or yellow sprinkles for the tassel knot
- Pull and peel licorice or thin candy strings: for tassels
- Knife and cutting board
- Mini muffin pan (optional): helpful if you want perfect brownie bite shapes
If you are building a whole party menu, I love adding one easy main snack so dessert is the star. Something like air fryer chicken bites keeps everyone happy while you set out the sweets.
Ingredient notes
Let’s talk through the ingredients so you can avoid the little annoying issues, like chocolate sliding off or brownies crumbling. These are the things I learned after making Graduation Cap Brownie Bites more times than I can count.
Brownies: Fudgy brownies work better than cakey brownies here. Cakey ones tend to crumble when you cut them into small squares. If you want a brownie recipe that is super rich, I also make this one sometimes: Instant Pot fudgy chocolate brownies. Just make sure the brownies are fully cooled before cutting. Warm brownies feel like a good idea, but they will fall apart on you.
Mini peanut butter cups: These are the perfect “cap base” because they are sturdy and already shaped. If you have allergies at your party, you can swap these for another small chocolate, like a truffle or a thick chocolate coin, but peanut butter cups are the easiest.
Chocolate squares: Thin squares are best because they look clean and sit flat. If your squares are too thick, the top can look bulky. You can also cut large chocolate bars into squares, but pre cut squares save time.
Frosting: You only need a little, but it matters. If your frosting is too soft, everything slides. If it is too stiff, it is hard to pipe or dab. I like to microwave frosting for 5 seconds, stir, then let it sit for a minute so it is spreadable but still holds.
Tassels: Pull and peel licorice is my favorite because you can make thin strings. If you cannot find it, you can use a thin strip of Fruit Roll Up or even piped frosting lines. The tassel does not need to be perfect. Once people see the cap shape, their brain fills in the rest.
“I made these for my niece’s graduation and they were the first dessert gone. People kept asking where I bought them. They are cute, easy, and the brownie plus peanut butter combo is so good.”
How to make this recipe
This is the part where you will feel like a crafty genius, even if you are not usually a crafty person. The key is to take it step by step and not rush the cooling time.
Step by step directions
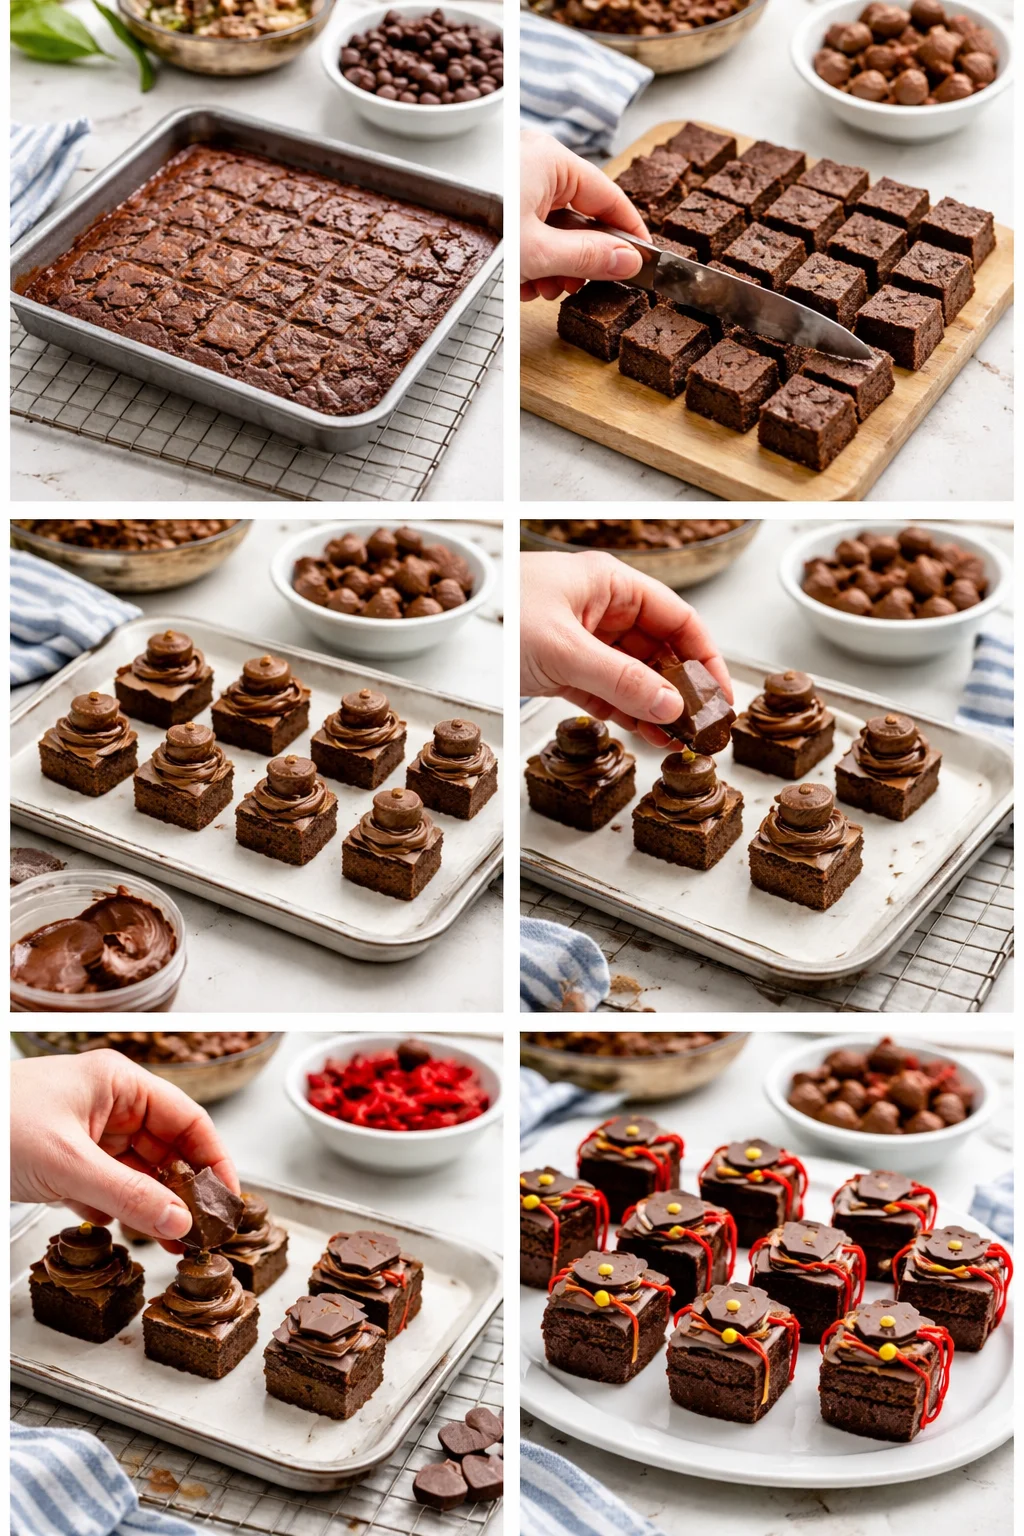
1. Bake and cool the brownies. Bake your brownies in a pan. Let them cool completely. If you want to speed it up, you can chill them in the fridge for 30 to 45 minutes. Cold brownies cut cleaner.
2. Cut brownie bites. Cut the brownies into small squares, about the size of the mini peanut butter cups. You do not have to be perfect. If one is a little bigger, that is fine. I like to wipe the knife between cuts for neat edges.
3. Attach the base. Put a small dab of frosting on top of each brownie square. Stick an unwrapped mini peanut butter cup on top, flat side up. Press gently so it stays put.
4. Add the cap top. Add another dab of frosting on the peanut butter cup. Place a chocolate square on top, centered, so it looks like the flat graduation cap.
5. Make the tassels. Cut thin strands of licorice, about 2 to 3 inches long. Add a tiny dot of frosting to the center of the chocolate square. Place one end of the licorice strand into the frosting so it drapes off the side like a tassel.
6. Add the knot. Stick one yellow candy piece on top of the frosting dot to look like the tassel button. Give it a minute to set before you move the bites.
7. Let them set. I like to refrigerate the tray for 15 to 20 minutes so the frosting firms up. Then you can stack them in a container with wax paper between layers if you need to travel.
Little note: if you are making Graduation Cap Brownie Bites for a big group, I suggest assembling them assembly line style. Cut all brownies first, then add all peanut butter cups, then all chocolate squares, then tassels. It goes way faster and it feels less chaotic.
If you are also planning easy snacks for the party day, I always like one thing that cooks while I do other stuff. These crockpot garlic butter beef bites and potatoes are great for that, especially if family is hanging around all afternoon.
Expert tips
I am not a professional baker, but I have made these enough times that I have strong opinions now. Here are the tips that keep Graduation Cap Brownie Bites looking sharp and tasting great.
Cool brownies are your best friend. If your brownies are warm, the frosting melts and the cap tops slide. Chill them if you have to.
Use a thicker frosting for “glue.” If your frosting is runny, stir in a spoonful of powdered sugar to thicken it up. You want it to hold the candy in place.
Centering matters more than perfection. Even if your brownie cuts are not exact, try to center the peanut butter cup and chocolate square. That is what makes them look clean in photos.
Keep tassels short. Long tassels get snagged when people grab bites from a tray. Short and simple looks cute and stays put.
Make ahead plan: You can bake brownies a day early and store them covered. Assemble the caps the morning of the party, or the night before if you have fridge space. They hold up well chilled.
Also, if you are doing a whole “bites” theme for your celebration, it is kind of fun to mix in other bite sized recipes. For dessert variety, these air fryer churro bites with chocolate dipping sauce are a total crowd pleaser next to the brownie caps.
Common Questions
Can I use a brownie mix?
Yes, absolutely. I do it all the time. Just aim for a fudgy style mix and do not overbake.
How do I keep the chocolate squares from sliding?
Let the brownies cool fully, then chill the assembled bites for 15 to 20 minutes. Also, use a small amount of thicker frosting, not a huge blob.
Can I make these nut free?
Yes. Swap the mini peanut butter cups with a nut free chocolate candy that has a similar shape, like a small chocolate round. Just make sure it is sturdy enough to hold the square on top.
What is the best way to cut clean brownie squares?
Chill the brownies first. Use a sharp knife and wipe it between cuts. It makes a big difference.
How many should I make per person?
For a dessert table with other sweets, I plan 1 to 2 per person. If these are the main dessert, plan 2 to 3 per person because people will grab seconds.
A sweet send off for the graduate
Graduation Cap Brownie Bites are one of those treats that look festive right away, and they still taste like the classic chocolate dessert everyone loves. If you want more graduation themed ideas, I have bookmarked Graduation Cap Cupcakes – Mom Loves Baking for a cute cupcake option, and Graduation Cap Brownie Bites – Party Pinching is another fun take if you like comparing decorating styles. Make a batch, snap a few pictures before they disappear, and enjoy the little moment when everyone recognizes the caps and gets excited. You have enough going on during graduation season, so let dessert be the easy part.

Graduation Cap Brownie Bites
Ingredients
Brownie Ingredients
- 1 box Brownies (box mix or homemade) Fudgy brownies work best.
Cap Decoration Ingredients
- 12 pieces Mini peanut butter cups Unwrapped.
- 12 pieces Chocolate squares Thin squares work best.
- 1 cup Frosting (chocolate or vanilla) Use a thicker consistency for better hold.
- 1/4 cup Yellow candy Mini M&Ms, small jelly beans, or yellow sprinkles for the tassel.
- 1 cup Pull and peel licorice or thin candy strings For making tassels.
Instructions
Preparation
- Bake and cool the brownies. Bake your brownies in a pan and let them cool completely, or chill them in the fridge for 30-45 minutes.
- Cut brownie bites into small squares, approximately the size of mini peanut butter cups.
Assembly
- Put a small dab of frosting on top of each brownie square and stick an unwrapped mini peanut butter cup on top, press gently.
- Add another dab of frosting on the peanut butter cup and place a chocolate square on top, centered.
- Cut thin strands of licorice for tassels and attach them by placing one end into a dot of frosting on the chocolate square.
- Stick one yellow candy piece on top of the dot of frosting to resemble the tassel button.
- Refrigerate the tray for 15-20 minutes to let the frosting firm up before serving.